Using Azure Devops CI/CD Pipelines, PowerShell and Packer, create Builds and Releases for a scale-out Win10 1903 WVD deployment in Azure.
- Overview
- Files
-
Azure Devops
- Pre-reqs / Requirements
- Devops Project Setup
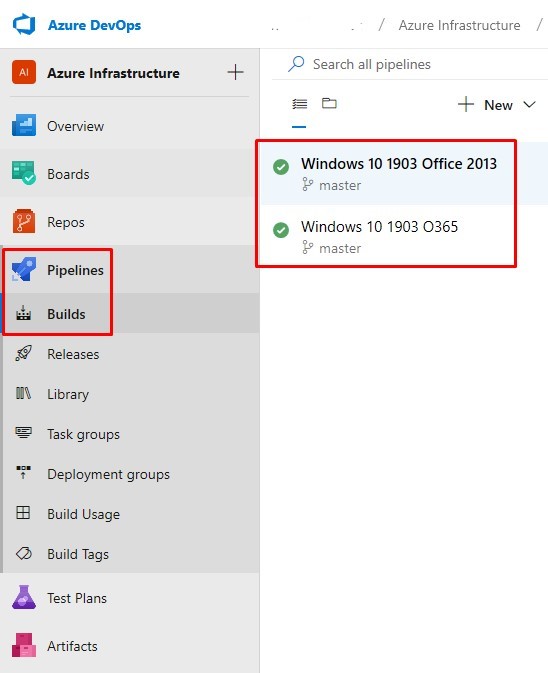
- Build Pipeline
- Release Pipeline
- Final Word
Overview
Ok, it’s difficult for me to explain what this post is about using just the title and subtitle so I’ll try and do a better job here.
With Windows Virtual Desktop being close to GA now, I wanted to put a continuous build solution together for the Windows 10 Azure VM Image which will be used to build the WVD solution from. In English this means we will be building a traditional Windows 10 gold image with all our apps and static config etc. and then using this image to deploy Azure VMs from, forming the Windows Virtual Desktop Host Pools for RemoteApps.
The gold image will contain all applications, installed using Packers’ PowerShell Provisioner. Not only is a Build Pipeline used but a Release Pipeline is then run to deploy the WVD solution to Azure using this latest Build image artifacts and the WVD ARM Template.
As a regular consultant for SCCM/ConfigMgr/Intune, using Devops + Packer + Azure to build Win10 machines from a gold image seems similar in approach to SCCM Task sequences (B&C, Deployment), however rather than using the Microsoft VLSC ISO as the base to start with, here we have image transform steps like:
Azure Marketplace Win10 EVD image > Azure VM Managed Image > WVD
A close alternative to the HasiCorp Packer steps in the Azure Devops Pipelines, as described in this post, is the preview service from Microsoft: Azure Image Builder which is actually based on Packer as well - only in Azure Image Builder we can submit the whole job as an ARM Template - I will hopefully get time to test this preview service out soon and issue another writeup ![]() .
.
So before you get to the TL;DR section, these are some of the cool things I’m going to use to put this solution together:
- Azure Devops Pipelines (Build & Release)
- HashiCorp Packer
- Azure VM Managed Image (not VHD)
- Azure Key Vault
- Azure Devops Custom Host Agent (running on an Azure VM)
- Azure File Share (for application installation)
- ARM Template for Windows Virtual Desktop Host Pool provisioning
Most of the ideas for this solution came from @samcogan’s post: Building Packer Images with Azure DevOps. Thank’s Sam.
Files
A finished Packer template which creates a Windows 10 1903 (without Office) Azure VM Managed Image:
If you follow the rest of the post, we’ll see how this template is built, what the components do and how they integrate with Azure Devops and Azure.
Azure Devops
Pre-reqs / Requirements
-
Access with Basic Access Level at least to an Azure Devops organisation and/or project. Stakeholder level doesn’t allow Pipelines to be used!
Note: There is also a preview feature to allow Stakeholders access to pipelines
- Owner access to an Azure Subscription so you can create Resource Groups, VMs, Key Vaults, Images and a Subscription level service principal
- Windows Virtual Desktop tenant owner permissions
- Azure AD Global Admin access, or access to create new service principals
Devops Project Setup
Outline
The Azure Devops Build Pipeline will be used to run Packer, which takes an Azure Marketplace Win10 1903 EVD image (with or without O365 ProPlus) and builds a VM from it. Once the VM is provisioned, Packer PowerShell Provisioner will connect to an Azure File Share and begin to install your business applications. Once the custom config/apps are finished, Packer will sysprep, shutdown and convert the VM to an Azure VM Image - following this, all the other resources are cleanly removed.
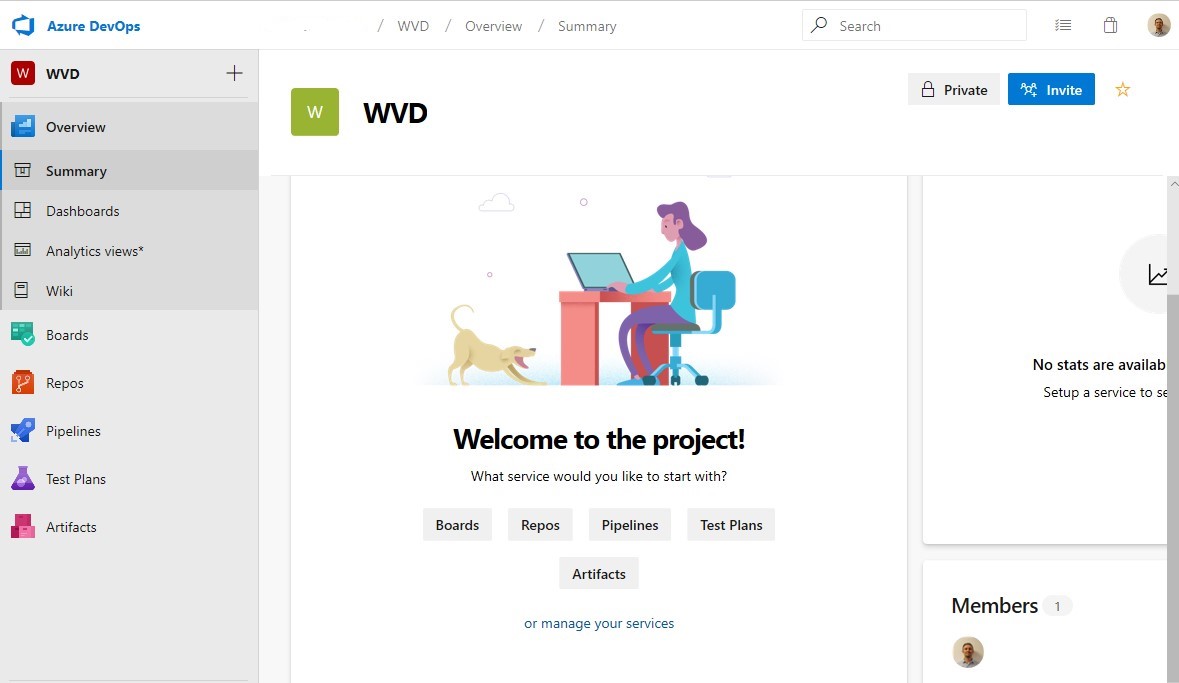
New Devops Project
Start off by creating a new Project in Azure Devops:
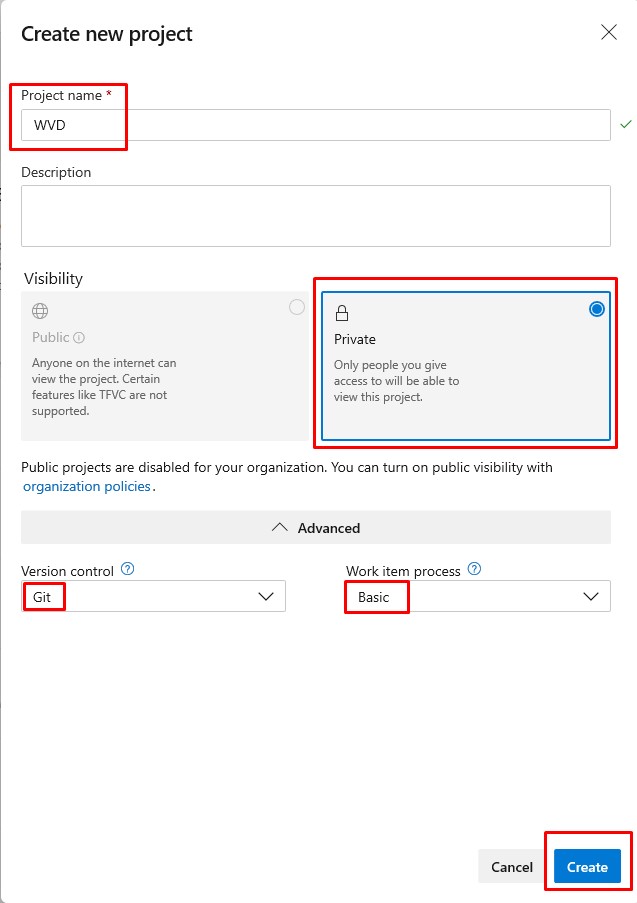
Give the Project a name.
Choose Private, unless your Org allows public projects, in which case there are benefits like extra runtime minutes for the hosted agents - which is extremely handly for long running Build tasks.
I expect you’ll want to use Git based version control, but it doesn’t matter for the purposes of this project, same goes for work item process - basic is fine.
Repo
You can Clone the repo into VSCode if you wish. I’m going to show the process using the Devops web portal.
Initialise Repo
Initialise the Repo that gets created automatically:
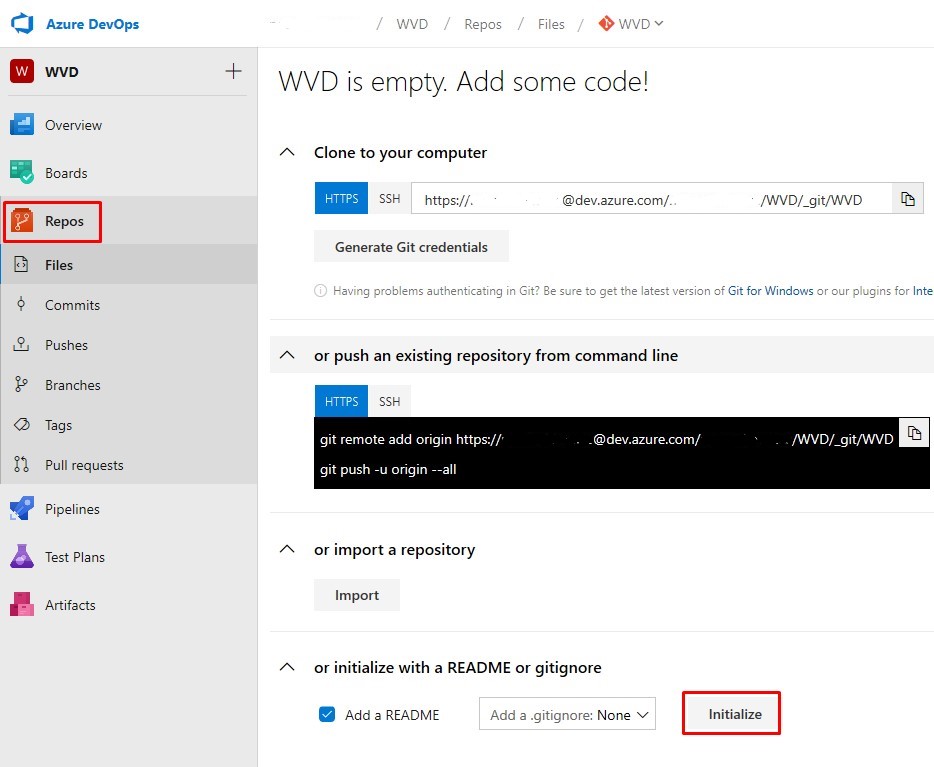
Folders
Create two new folders:
- Packer Build - Win10 1903 EVD
- ARM Templates

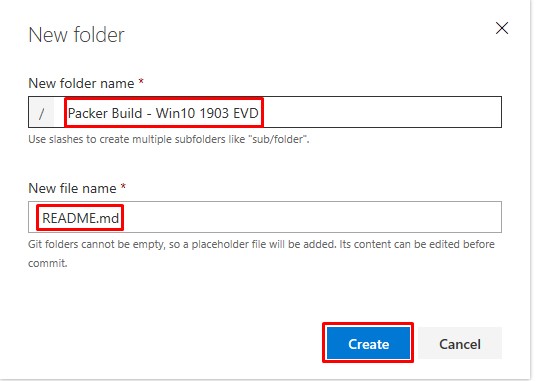
Commit the Readme in the new folder:

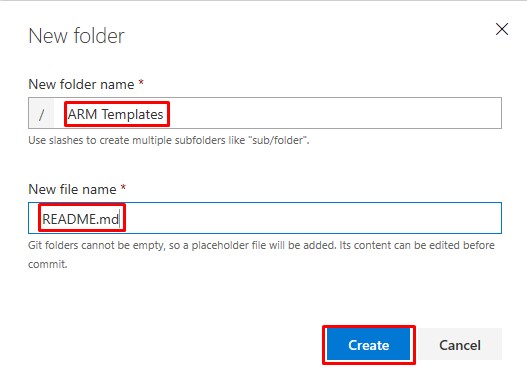
Repeat for the ARM Templates folder:
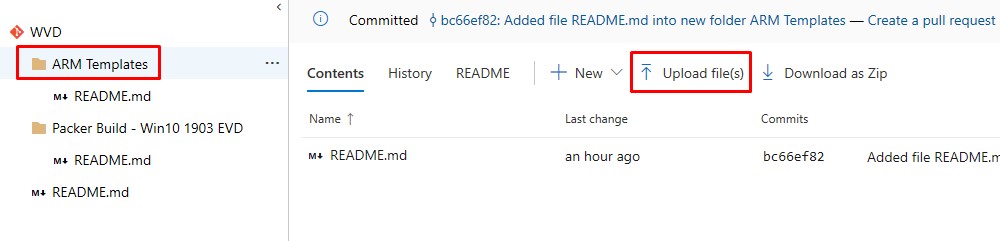
ARM Template
Using guidance here: Create a host pool with an Azure Resource Manager template, download the WVD ARM template from Github.
Even though I already have an existing WVD Host Pool (created using the Azure Portal originally) I am using the Create and provision new Windows Virtual Desktop hostpool template rather than the Update Existing Windows Virtual Desktop Hostpool template. Reason being, it fits better with the release process in my opinion. I don’t want to deallocate or delete the existing Host Pool VMs (which is what the latter template does) until I’m satisfied the new VMs are working.
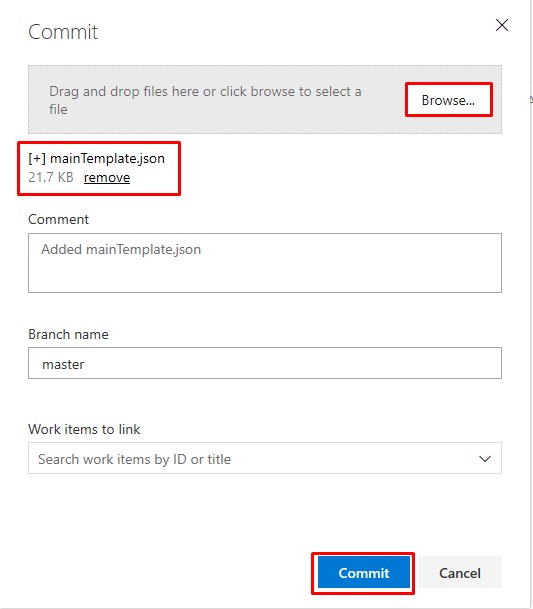
Upload the template to the ARM Templates folder:
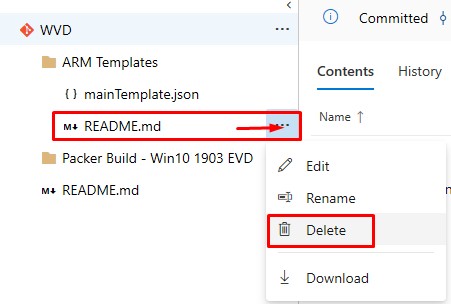
You can delete the README.md now (so that it doesn’t appear as a Build artifact later on):
Packer Template
Now lets get an example copy of a Packer template for Azure based on using an existing image: windows_custom_image.json
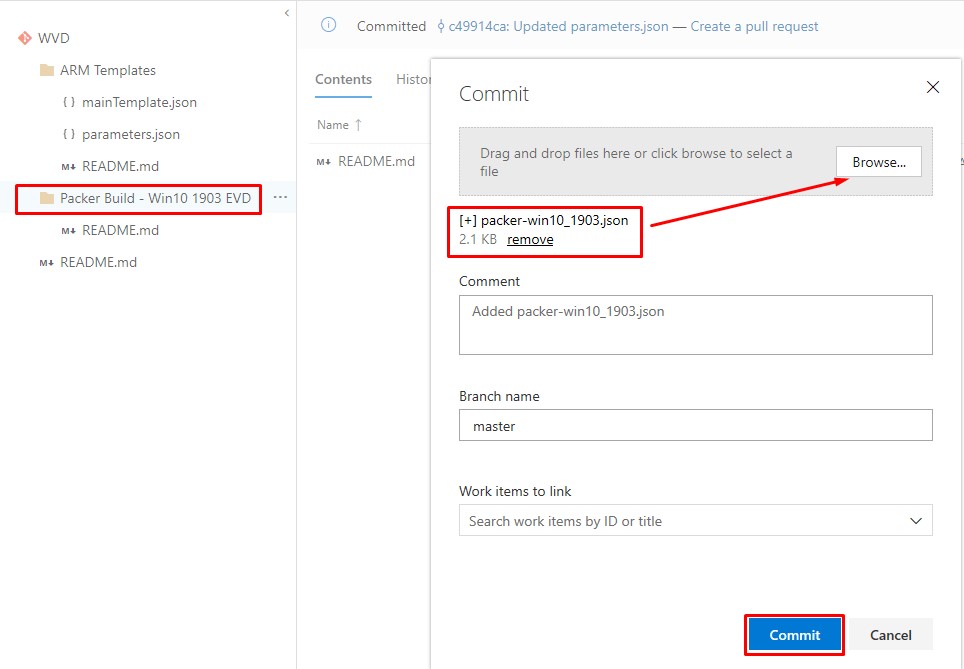
Save the file to disk as packer-win10_1903.json and upload it to the Packer Build - Win10 1903 EVD folder:
The file structure should like the following:
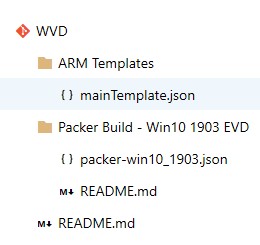
The repo and template files structure is now complete. We will need to edit the Packer template now, but the WVD ARM template should remain static.
Packer VM Build Service Principal
Packer will need an Azure Service Principal in the Azure subscription where the WVD machines will be built. Packer creates a Resource Group, Key Vault, VM, Storage and networking during each Build - which it then deletes at the end, after the VM Image has been successfully created. My Service Principal has Contributor access at the Subscription level but you can of course allocate the individual roles instead.
Get the Application ID and the Secret of the new Service Principal. Keep these handy for a while (but not saved to disk) as we’ll be using them a few times.
In your Repo, edit the packer-win10_1903.json and remove the values from the client_id and client_secret variables (This is important - don’t hardcode this secret info into variables - we will use Azure Key Vault later). It should look like this:
"client_id": "",
"client_secret": "",
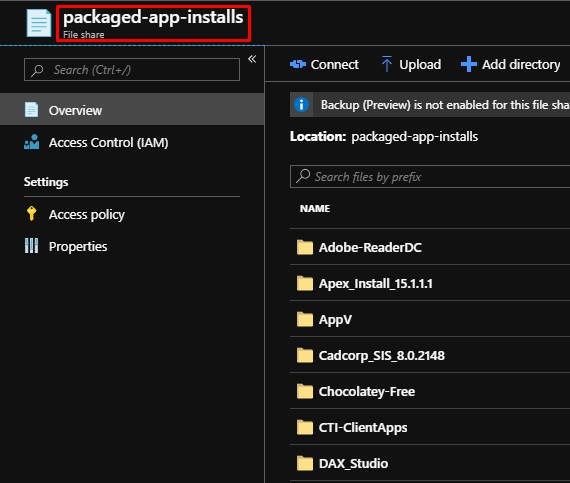
Azure File Share
We’ll use an Azure File Share which will be mapped as an SMB drive from Windows during the Packer build process. This will host the binaries/packages for all the application installs that will go into the gold image (Azure VM Image).
You can create the Azure File Share in an existing Azure Storage Account.
Once your File Share is created, upload all your application install sources:
Ii you click on Connect you’ll be able to copy and paste the UNC path for the share that we’ll need to our Devops variable later:
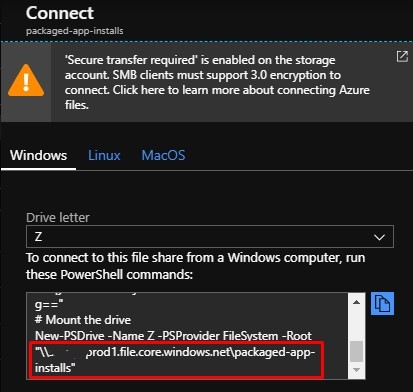
Finally, get the Storage Account name and Access Key so that we can store it in the Key Vault later on.
WVD Security
WVD Service Principal
The WVD Service Principal will have RDS Owner rights so that when we deploy the Azure Image created with Packer with the ARM template, the VMs will join the WVD Host Pool using the Service Principal creds.
If you don’t already have one, create a Service Principal as a Windows Virtual Desktop RDS Owner: Tutorial: Create service principals and role assignments by using PowerShell
Use these sections:
- Create a service principal in Azure Active Directory
- Create a role assignment in Windows Virtual Desktop
WVD Domain Join Creds
We will need the Active Directory user UPN and password of the account that access to join the Win10 WVD VMs to the Active Directory domain.
Key Vault
Create a new or use an existing Azure Key Vault for the purposes of storing our secrets that will be used during the Build and Release Pipelines.
There are different methods for retrieving and using secure variables in Azure Devops, one way is to query the Key Vault directly, each time a Pipeline task runs, like in this post: Using secrets from Azure Key Vault in a pipeline
In my example here, we’ll sync the secrets from the Key Vault into an Azure Devops Variable Group and retrieve the secrets from that.
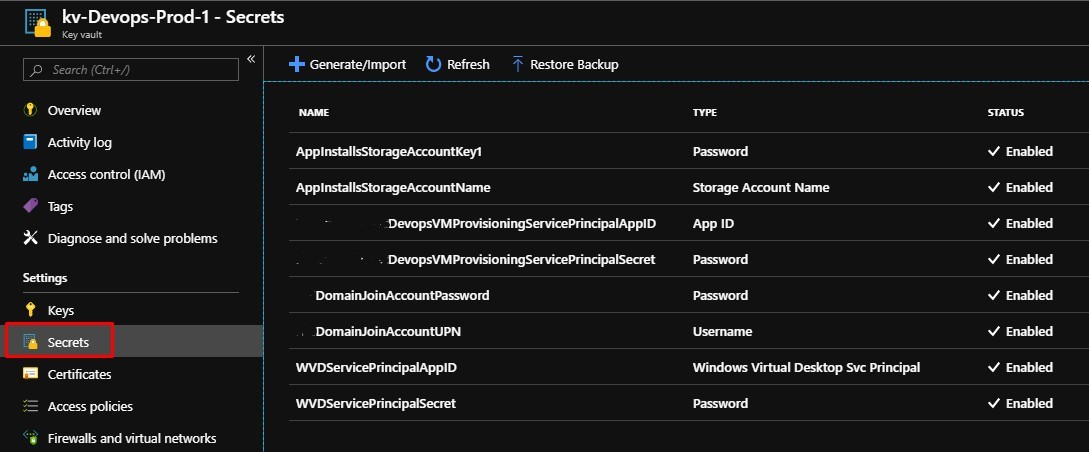
Secrets
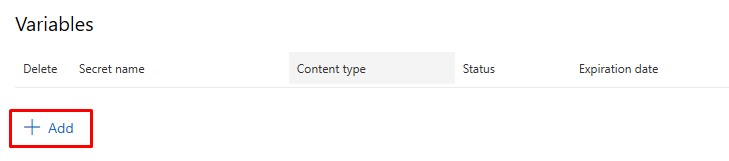
Once you have chosen which Key Vault you will store your secrets in, go ahead and add the following Secrets:
- Azure File Share Storage Account Name / Storage Account Access Key
- Azure Subscription Service Principal Application ID / Secret
- Active Directory Domain Join UPN / Password
- WVD Tenant Admin (Service Principal) Application ID / Secret
Devops Variable Group - Key Vault
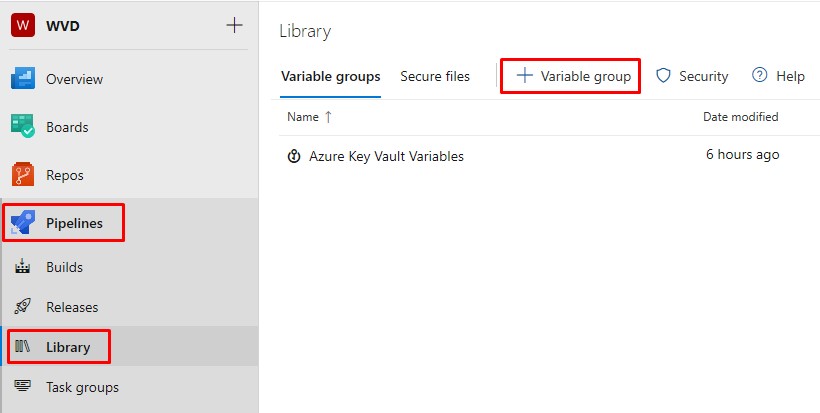
In your WVD project > Pipelines > Library, create a new Variable Group:
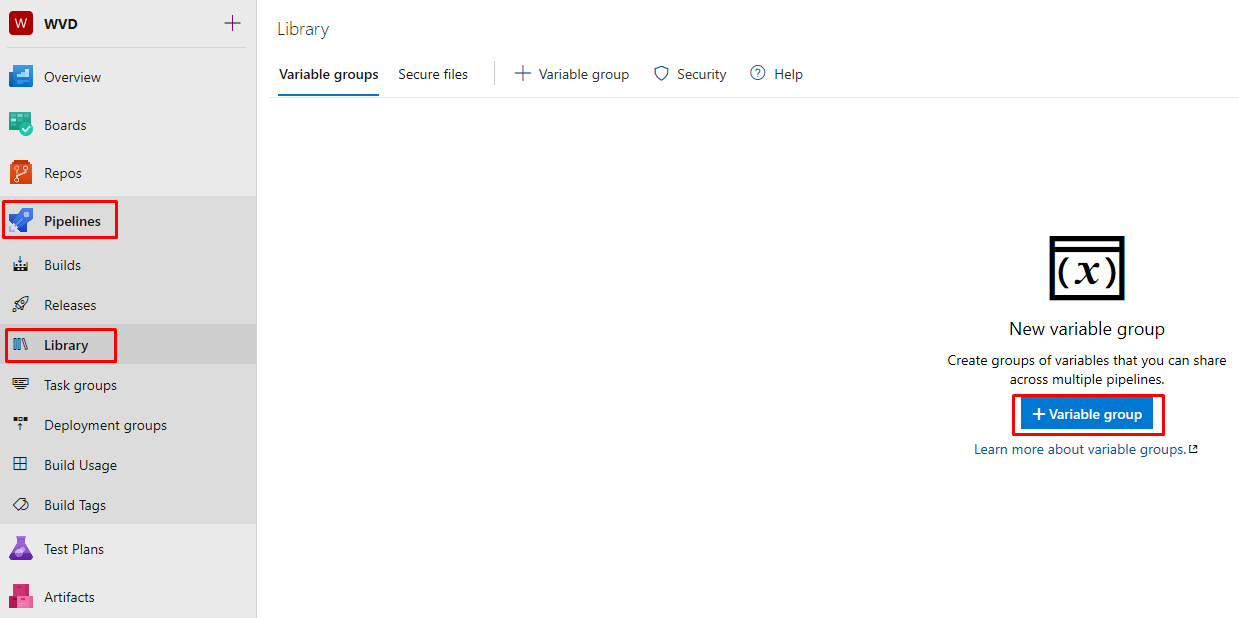
- Enable the Azure key vault option.
- Select your subscription from the drop-down menu.
- At first I didn’t see my subscriptions. I needed to grant the account I was using in Devops read access to the Azure subscriptions.
- Don’t authorize - as this will try and create a new Service Principal..
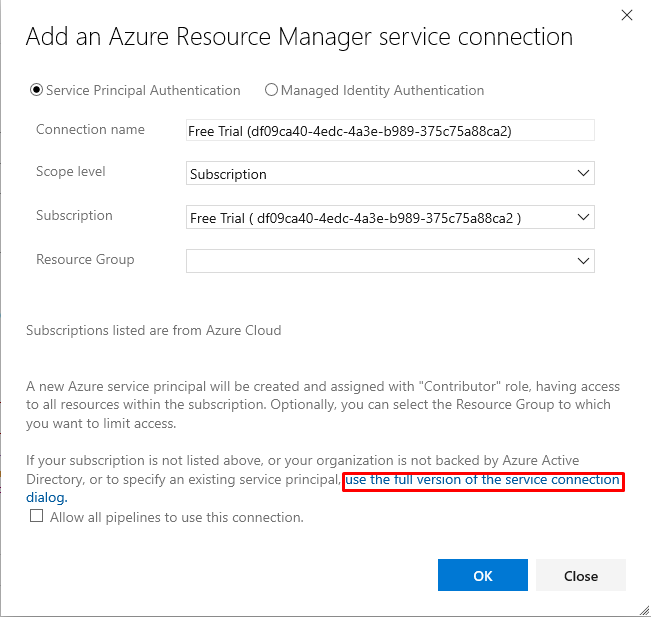
- Click the drop-down next to Authorize and choose Advanced options.
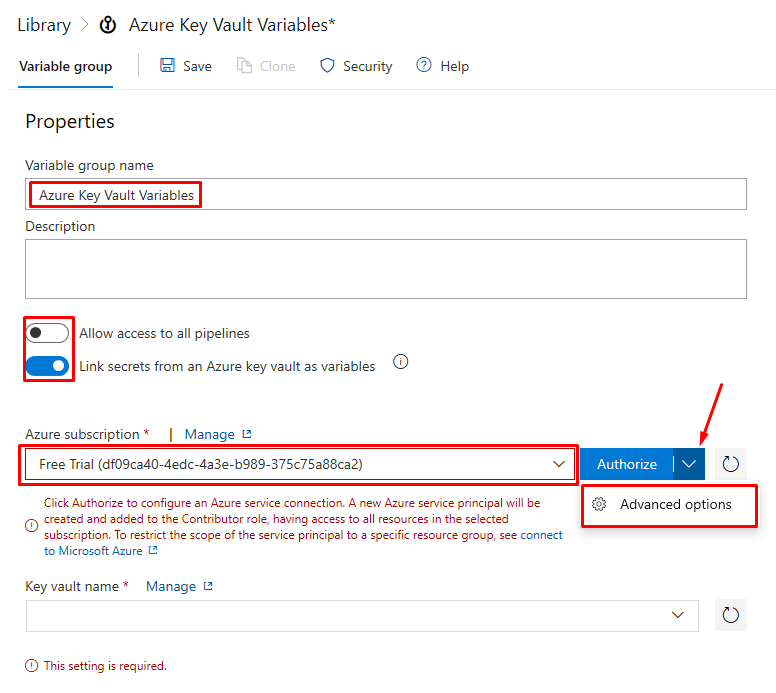
Click on the link for Use the full version of the service connection dialog:
Using Service Principal details (the one you created just now) fill in the Service principal client ID - this is the Application ID. Fill in the Service principal key - this is the Secret
These will map to the Packer variables client_id and client_secret later on.
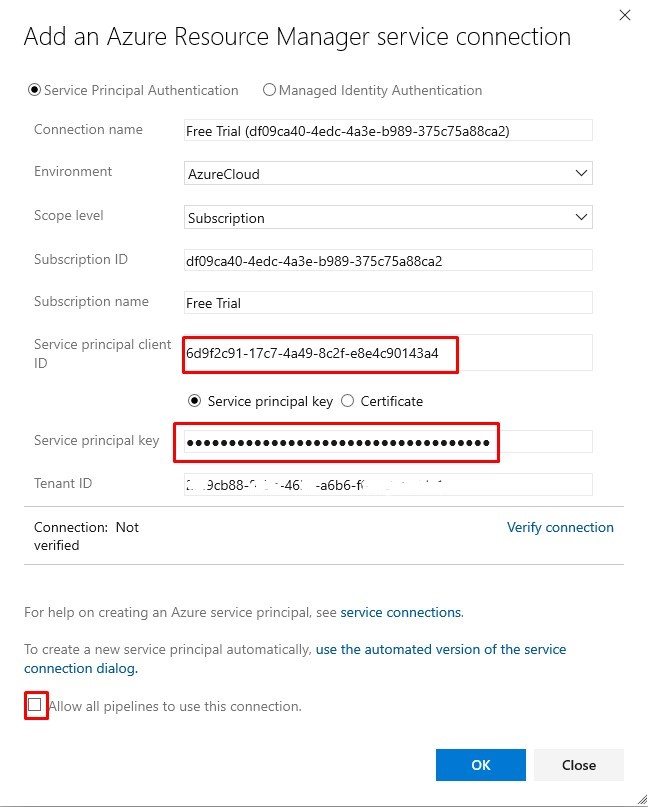
Verify the connection to confirm the Service Principal has access to the subscription, then click Ok:

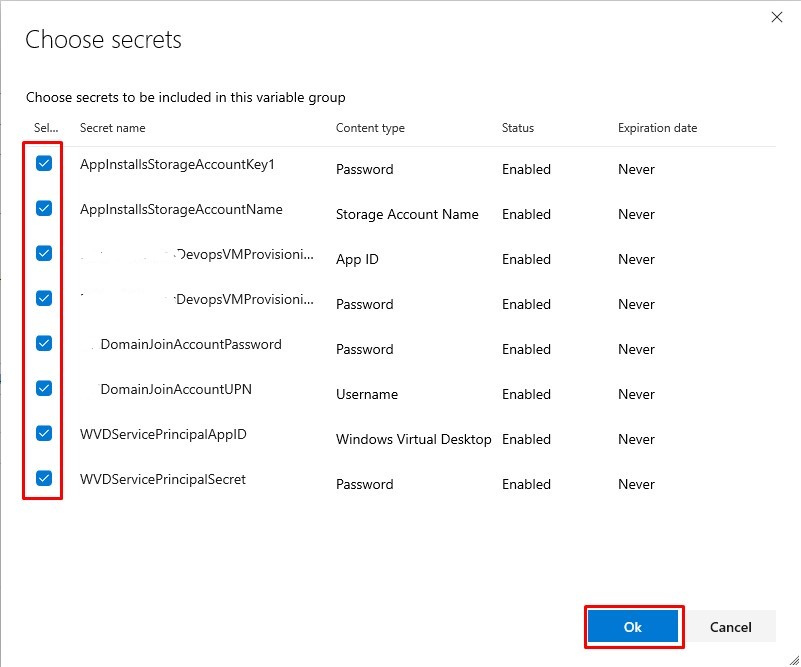
Select the Key Vault that you will use to store the variables/secrets:

Add the variables from the Key Vault in Devops:
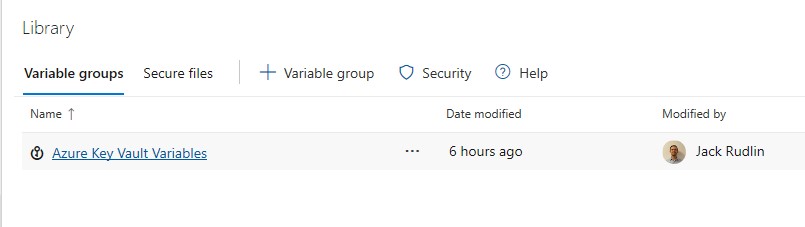
Save the new Variable Group:
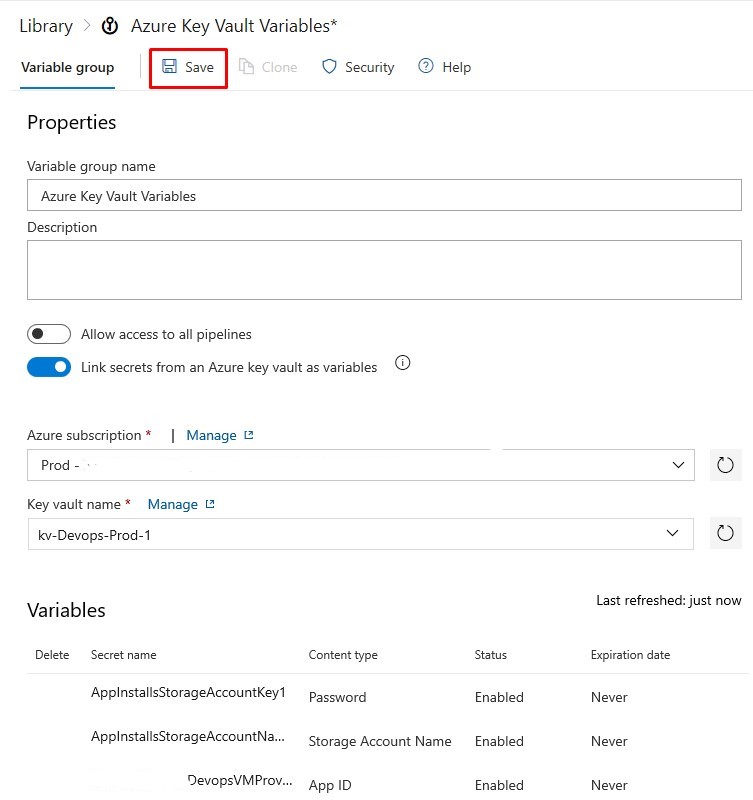
The secrets are now ready to be securely access from the Build and Release pipelines:
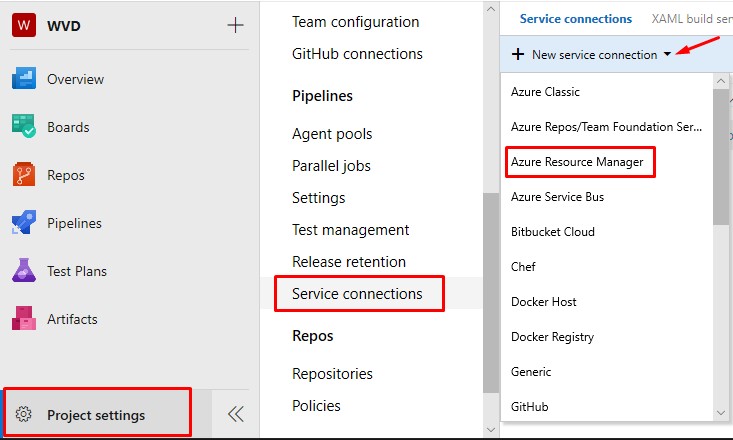
Devops Service Connection
We’ll also need a connection so that Devops Pipeline Tasks (like the deploy ARM template) can authenticate natively without passing any additional credentials during build time.
The setup is almost identical to the above key vault connection in that you use the existing Service Principal again:
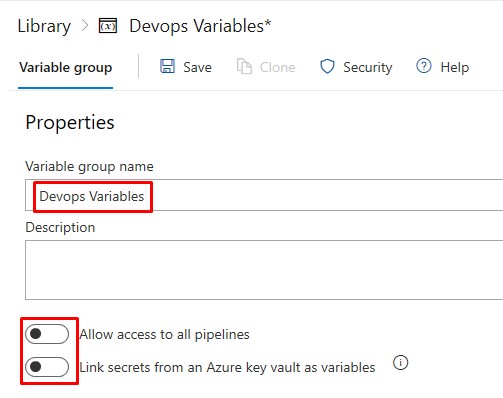
Devops Variable Group - Devops
Not all the variables used need to be stored in an Azure Key Vault. It’s simpler for variables that don’t require encryption, to be stored in standard Devops Variables Groups.
In your WVD project > Pipelines > Library, create a new Variable Group:
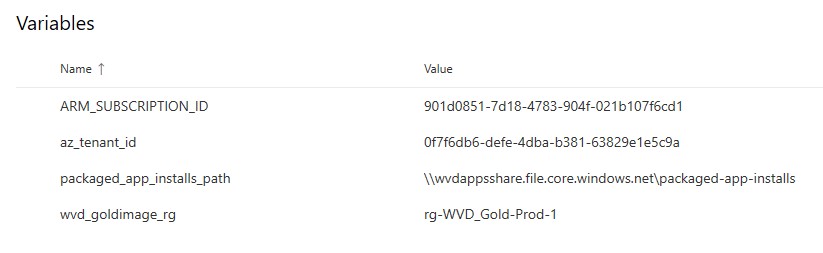
Add the following new variables and their associated values.
- Subscription ID and AAD Tenant ID are obvious.
-
packaged_app_installs_pathis the UNC path to the Azure File Share that was created earlier. -
wvd_goldimage_rgis the name of the Resource Group in Azure, where the gold image for WVD will be stored after the Packer build completes. This Resource Group must already exist.
Packer Template - Detailed
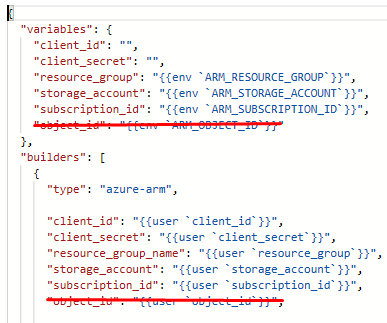
Object ID
Seems like the Packer template on Github has an undocumented and unrequired variable/builder property. Go ahead and delete object_id references from the Variables and Builders sections:
More Secrets - Azure Files
Earlier we edited the Packer template to support the client_id and client_secret secure variables for our Service Principal.
For the Packer build, the only other secure variables we’ll use are the Azure Storage Account name (the one that contains the Azure File Share as detailed above) and the Access Key for said Storage Account.
Edit the Packer template: packer-win10_1903.json and add two new empty variables:
"AppInstallsStorageAccountName": "",
"AppInstallsStorageAccountKey1": "",
So the variables section should now look like this:
  "variables": {
    "client_id": "",
    "client_secret": "",
    "AppInstallsStorageAccountName": "",
    "AppInstallsStorageAccountKey1": "",
    "resource_group": "",
    "storage_account": "",
    "subscription_id": ""
  },
Packer Custom Variables
Packer can accept variables passed from the Azure Devops tasks as environment variables. Don’t hard code any values, we will be passing the values (mostly from the Variable Group) later on when we the Build and Release pipelines.
Checking the Packer build configuration reference we can see that if we’re generating an Azure VM Managed Image like this:
then we need to use some different properties in the json template.
In the variables section, delete lines:
"resource_group": "",
"storage_account": "",
and replace with:
"wvd_goldimage_rg": "",
"az_tenant_id": "",
"packaged_app_installs_path": "",
"Build_DefinitionName": "",
"Build_BuildNumber": ""
The variables section now looks like this:
  "variables": {
    "client_id": "",
    "client_secret": "",
    "AppInstallsStorageAccountName": "",
    "AppInstallsStorageAccountKey1": "",

    "wvd_goldimage_rg": "",
    "az_tenant_id": "",
    "subscription_id": "",

    "packaged_app_installs_path": "",

    "Build_DefinitionName": "",
    "Build_BuildNumber": ""
  },
Explanation:
-
"resource_group"and"storage_account"variables are only required for VHD type builds so we don’t need those as we’re building a VM Managed Image. -
"wvd_goldimage_rg"is the Resource Group where the gold image that Packer creates will be stored - it must exist already. -
"az_tenant_id"the AAD Tenant linked to the Azure subscription the resources will be deployed in. -
"packaged_app_installs_path"This will be the UNC path to the Azure File Share created earlier. -
"Build_DefinitionName"and"Build_BuildNumber"are builtin Devops variables taken from the properties of the Build pipeline. These are used to name the Azure VM Managed Image.
Packer Builder Properties
You may have noticed that we just deleted the "resource_group" and "storage_account" variables from the variables section, so naturally we need to do the same in the builders section too, as well as removing some others:
Edit the Packer template again (packer-win10_1903.json) and delete the following lines from the builders section:
"capture_container_name": "images",
"capture_name_prefix": "packer",
"image_url": "https://my-storage-account.blob.core.windows.net/path/to/your/custom/image.vhd",
My builders now looks like this:
"builders": [
  {
    "type": "azure-arm",

    "client_id": "",
    "client_secret": "",
    "subscription_id": "",

    "os_type": "Windows",

    "azure_tags": {
      "dept": "engineering",
      "task": "image deployment"
    },

    "location": "West US",
    "vm_size": "Standard_DS2_v2"
  }
],
Now for adding a whole bunch of new properties to the Packer builders. I won’t go through each one individually here, as you can lookup the details in the Packer build configuration reference.
Add the following builders:
"tenant_id": "",

"managed_image_name": "--Build",
"managed_image_resource_group_name": "",

"image_publisher": "MicrosoftWindowsDesktop",
"image_offer": "Windows-10",
"image_sku": "19h1-evd",
"communicator": "winrm",
"winrm_use_ssl": "true",
"winrm_insecure": "true",
"winrm_timeout": "3m",
"winrm_username": "packer",

"managed_image_storage_account_type": "Premium_LRS",
"temp_resource_group_name": "rg-PackerBuild-Prod-1",
"virtual_network_name": "VNET-PROD-1",
"virtual_network_subnet_name": "Subnet-PackerImage-Prod-1",
"private_virtual_network_with_public_ip": "True",
"virtual_network_resource_group_name": "rg-VNET-Prod-1",
"azure_tags": {
    "Project": "Packer IT Image"
},
"async_resourcegroup_delete":true
My builders now looks like this:
"builders": [
  {
    "type": "azure-arm",

    "client_id": "",
    "client_secret": "",
    "tenant_id": "",
    "subscription_id": "",

    "os_type": "Windows",
    "managed_image_name": "--Build",
    "managed_image_resource_group_name": "",

    "image_publisher": "MicrosoftWindowsDesktop",
    "image_offer": "Windows-10",
    "image_sku": "19h1-evd",
    "communicator": "winrm",
    "winrm_use_ssl": "true",
    "winrm_insecure": "true",
    "winrm_timeout": "3m",
    "winrm_username": "packer",

    "managed_image_storage_account_type": "Premium_LRS",
    "temp_resource_group_name": "rg-PackerBuild-Prod-1",
    "virtual_network_name": "VNET-PROD-1",
    "virtual_network_subnet_name": "Subnet-PackerImage-Prod-1",
    "private_virtual_network_with_public_ip": "True",
    "virtual_network_resource_group_name": "rg-VNET-Prod-1",
    "azure_tags": {
        "Project": "Packer IT Image"
    },

    "location": "UK South",
    "vm_size": "Standard_B2S",

    "async_resourcegroup_delete":true
  }
],
Explanation: Yes, I’ve been a bit naughty and hard-coded some of the property values. This is because I know that the production VNET name is unlikely going to change, for example.
You will notice that in this configuration the Packer VM is deployed into an existing production VNET: "private_virtual_network_with_public_ip": "True",. You can of course use a dedicated, isolated VNET for the Packer build run (default) but this comes with it’s own challenges. In the environment this was run against, Azure Policies prevented VMs from being deployed to different VNETS. There are also Storage Account firewalls enabled, allowing only access from certain subnets/VNETS in the subscription.
Lets have a look at some of these new builder properties. A lot of these are self-explantory, so I won’t cover those obvious ones:
-
"managed_image_name"Automatically generated Azure VM Image object name as seen in the Azure portal. This is based on the Build number in Azure Devops, amongst other things. -
"image_sku": "19h1-evd",The “evd” is the Enterprise Virtual Desktop edition of Windows 10 required for Windows Virtual Desktop. You can use this guide from Microsoft to find different sku’s, like the one that includes Office 3651903-evd-o365ppFind Windows VM images in the Azure Marketplace with Azure PowerShell -
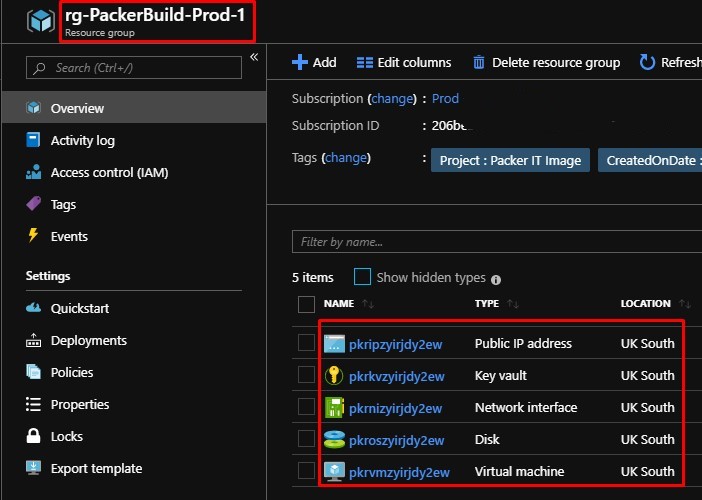
"temp_resource_group_name": "rg-PackerBuild-Prod-1",This RG doesn’t need to exist. The Packer build will create it using the AAD Service Principal. It will get deleted again when the build completes (success or failure). -
"virtual_network_subnet_name"The subnet within the VNET that the temporary RG will be created in. Make sure it has an NSG that allows inbound WinRM 5986 -
"vm_size": "Standard_B2S",is only used during the creation of the VM image - it has no bearing on what spec the WVD machines will be when deployed from said image.
At this stage we could actually run an Azure Packer build and it should sysprep and output an Image for us, but there are some further tweaks required first and we need at least a few applications installed in our Gold image from the Azure Files Share.
Packer PowerShell Provisioner
Packer Provisioners “use builtin and third-party software to install and configure the machine image after booting”. So after the builders stage is finished, we can start to run our PowerShell code before restarting and then sysprep’ing.
In my PowerShell Provisioners I want to map a drive to the Azure File Share (created earlier) so that all the software for the Gold Image can be installed over SMB.
Installing Chocolatey is also a good idea as many of the common packages can be installed directly from the public Choco repo.
Edit the Packer template again (packer-win10_1903.json) and add two new powershell Provisioners above the existing sysprep section, so the provisioners should now look like this:
  "provisioners": [
    {
      "type": "powershell",
      "inline": [
          "$ErrorActionPreference='Stop'",

          "Invoke-Expression ((New-Object -TypeName net.webclient).DownloadString('https://chocolatey.org/install.ps1'))",
          "& choco feature enable -n allowGlobalConfirmation",
          "Write-Host \"Chocolatey Installed.\""
      ]
    },
    {
      "type": "powershell",
      "inline": [
          "$ErrorActionPreference='Stop'",

          "Import-Module -Name Smbshare -Force -Scope Local",
          "$Usr='AzureAD\\'+\"\"",
          "New-SmbMapping -LocalPath J: -RemotePath \"\" -Username \"$Usr\" -Password \"\"",
          "Write-Host \"'J:' drive mapped\"",

          "Set-MpPreference -DisableRealtimeMonitoring $true",
          "Write-Host \"Defender RealTime scanning temporarily disabled\"",

          "& \"J:\\Microsoft-PowerBIDesktop\\Install-PowerBIDesktop-Choco.ps1\"",
          "Write-Host \"'Microsoft Power BI Desktop' installed\"",

          "& \"J:\\FSLogix\\2.9.7117.27413\\x64\\Release\\Install-FSLogixAppsSetup.cmd\"",
          "Write-Host \"'FSLogix\\2.9.7117.27413' installed\""

      ]
    },
    {
      "type": "powershell",
      "inline": [
        " # NOTE: the following *3* lines are only needed if the you have installed the Guest Agent.",
        "  while ((Get-Service RdAgent).Status -ne 'Running') { Start-Sleep -s 5 }",
        "  while ((Get-Service WindowsAzureTelemetryService).Status -ne 'Running') { Start-Sleep -s 5 }",
        "  while ((Get-Service WindowsAzureGuestAgent).Status -ne 'Running') { Start-Sleep -s 5 }",

        "if( Test-Path $Env:SystemRoot\\windows\\system32\\Sysprep\\unattend.xml ){ rm $Env:SystemRoot\\windows\\system32\\Sysprep\\unattend.xml -Force}",
        "& $env:SystemRoot\\System32\\Sysprep\\Sysprep.exe /oobe /generalize /quiet /quit",
        "while($true) { $imageState = Get-ItemProperty HKLM:\\SOFTWARE\\Microsoft\\Windows\\CurrentVersion\\Setup\\State | Select ImageState; if($imageState.ImageState -ne 'IMAGE_STATE_GENERALIZE_RESEAL_TO_OOBE') { Write-Output $imageState.ImageState; Start-Sleep -s 10  } else { break } }"
      ]
    }
  ]
- The first of the
provisionersinstalls Choco in it’s own PowerShell thread, so that subsequent threads will load the new%Path%to Choco.exe. - The second of the
provisionersmaps aJ:drive to the Azure File Share, using the Storage Account Name and key which are provided by secure variables. Soon we’ll put the Build Pipeline together so that these values are passed into the Packer template.- I’ve also disabled realtime Defender scanning to speed up the build time.
- There’s also an example of installing PowerBI Desktop from the J: drive (which actually just kicks off a Chocolatey install)
- and an FSLogix Apps install example.
You can grab the finished copy of this Packer build template on my Github repo packer-win10_1903.json.
Build Pipeline
We are ready to put all the components above together into a Build Pipeline and initiate the build run to generate the Gold image.
As we go through these steps, don’t forget to save regularly. You can save into the default root folder: 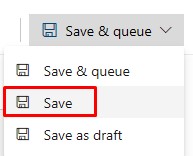
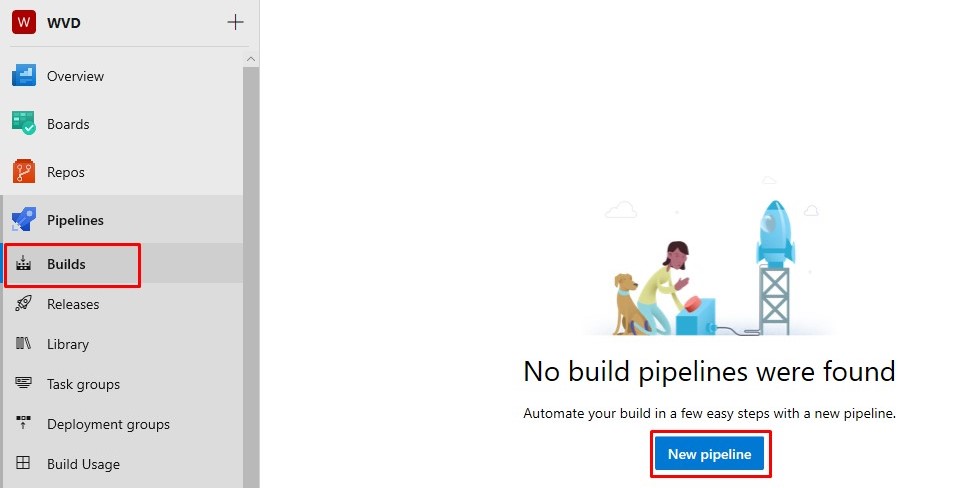
In your WVD Devops project:
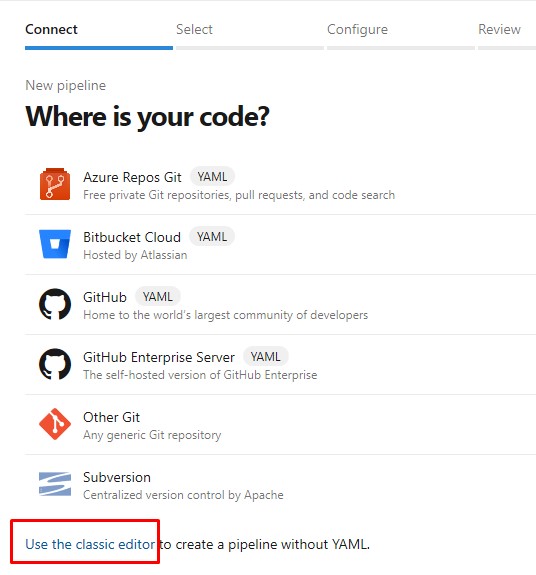
- Create a new Build Pipeline:
- I’m using the Classic editor as it’s a lot easier to visualise:
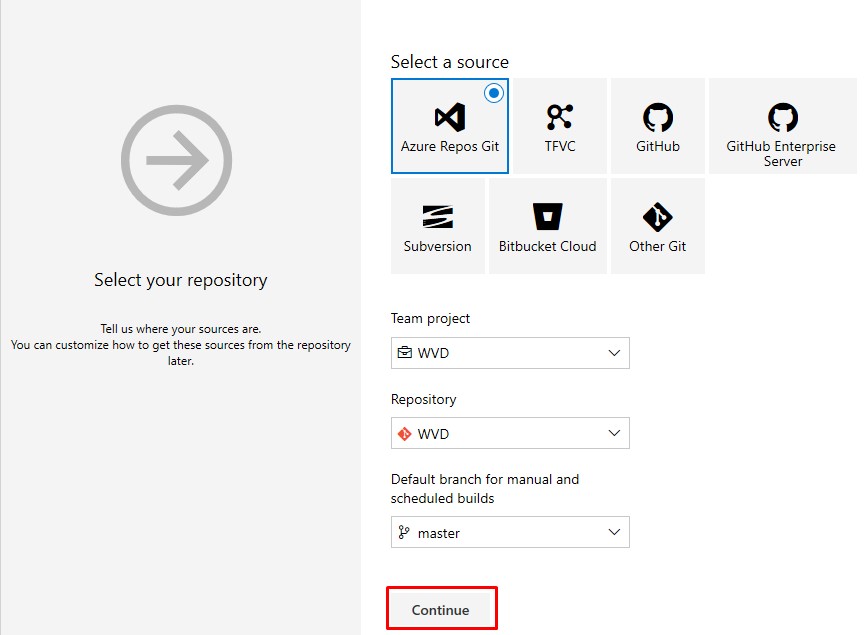
- We already have the Azure Devops Repo created earlier, so leave the defaults:
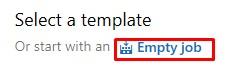
- Create an Empty Job:
-
As it stands, our Packer template won’t take more than 60 mins to complete. 60 mins is the max runtime for a private Azure Devops projects using Devops Hosted Agents. If the build starts to creep up to 60 mins, consider using Self-hosted Windows agents on a low-spec/low-cost Azure VM, as these have unlimited runtime minutes. Also consider making the project public

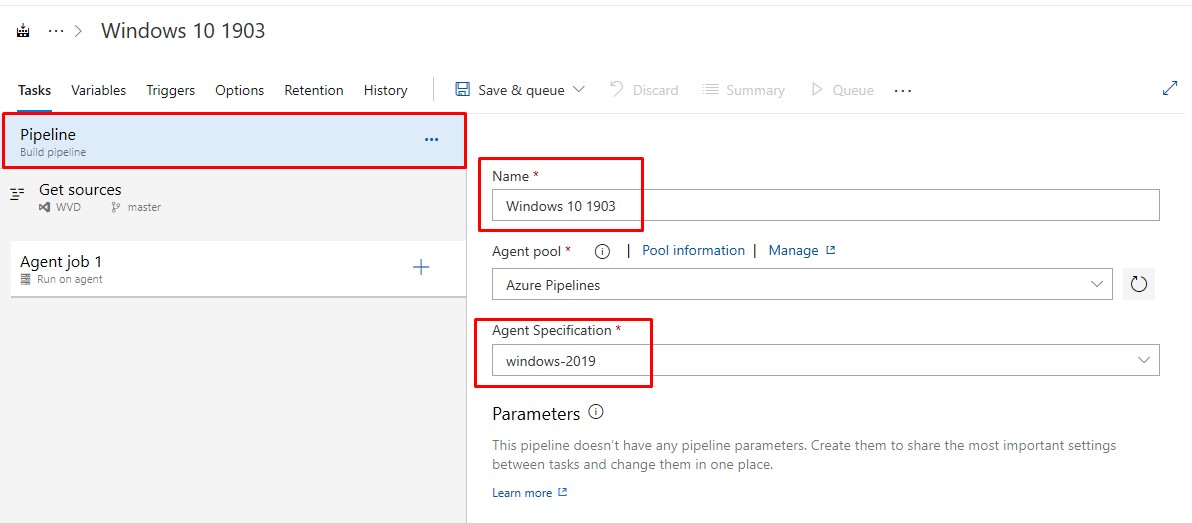
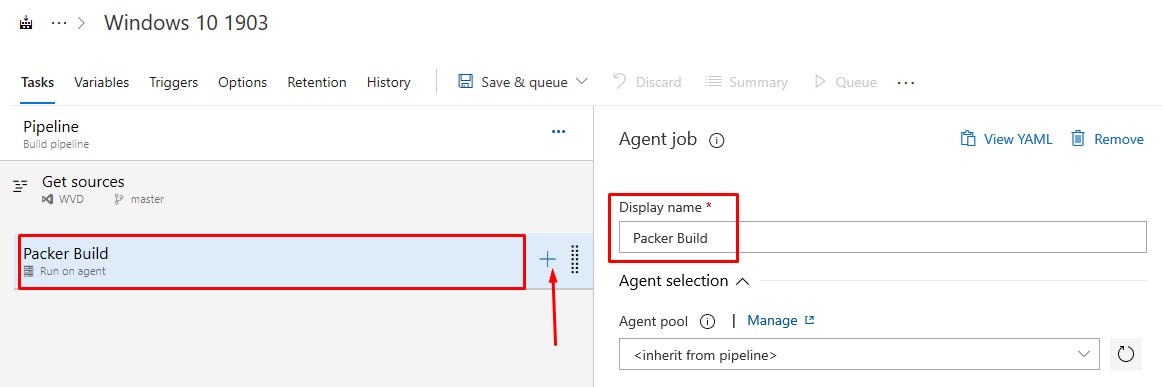
Give the Build a meaningful name - this will be used when generating the Azure VM Managed Image name.
You can use pretty much any agent spec. I’ve tested on VS2017 and VS2019. windows-2019 includes Visual Studio 2019.
- Name the Agent Job step and click on the + to add a new task:
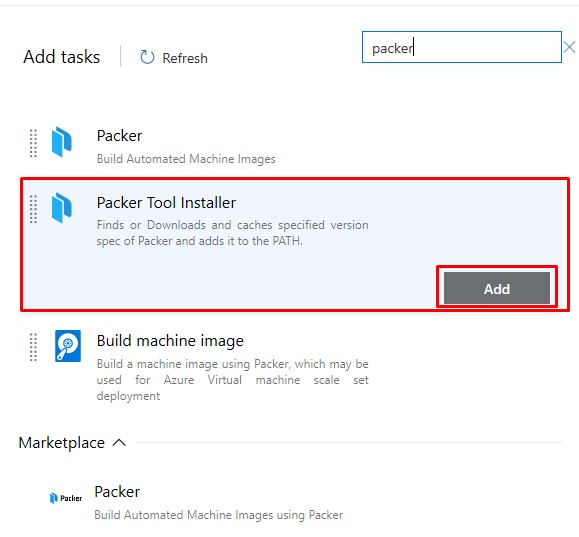
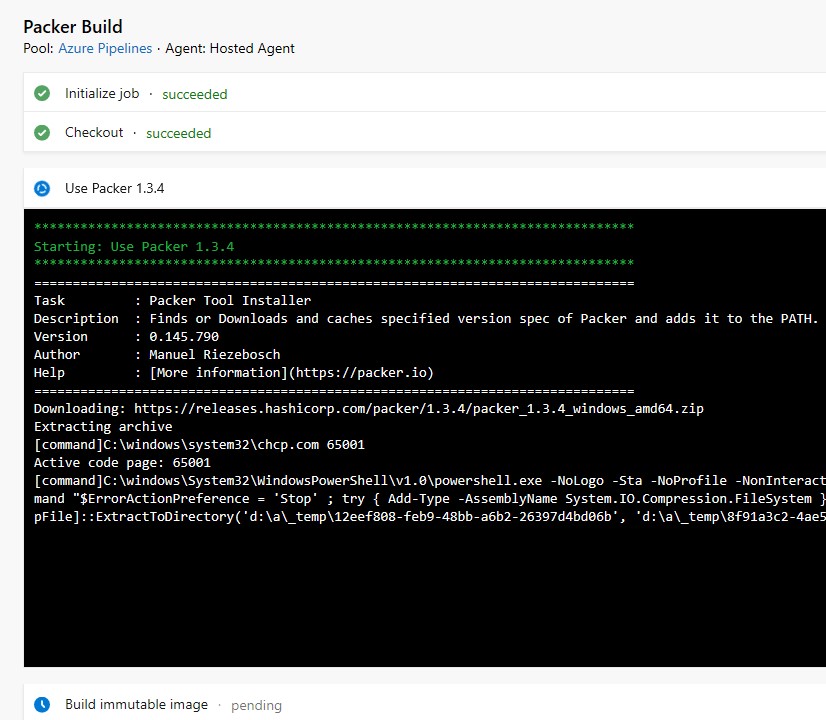
- Add a Packer Tool Installer Task
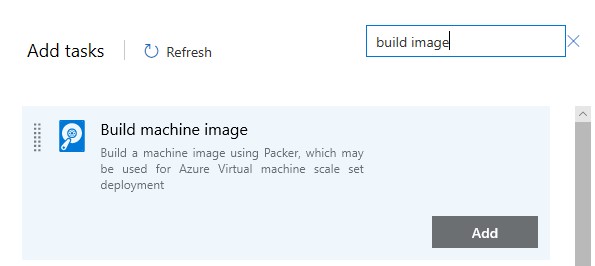
- Add a Build Machine Image Task
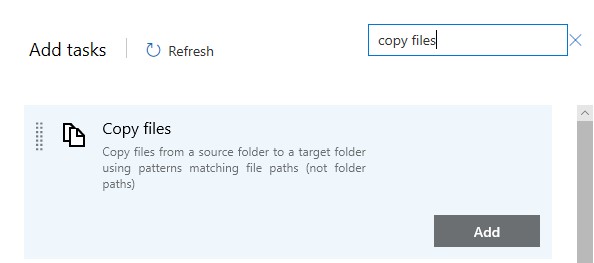
- Add a Copy files Task
-
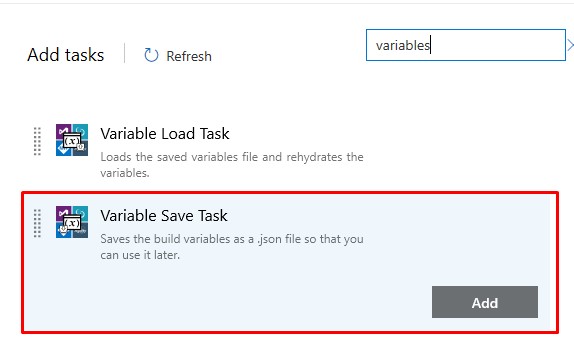
Install the Variable Tools from the Marketplace:

Then add a Variable Save Task
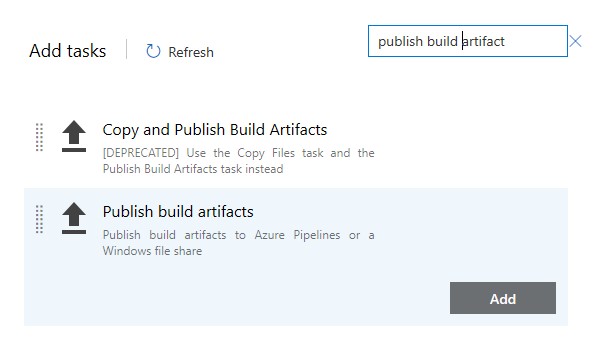
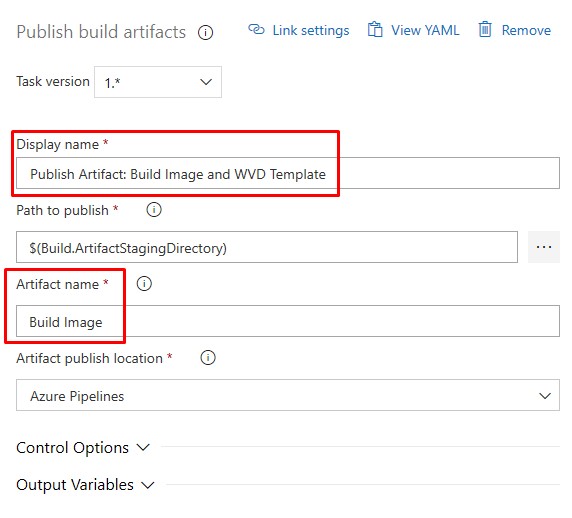
- Finally, add a Publish Build Artifact Task
-
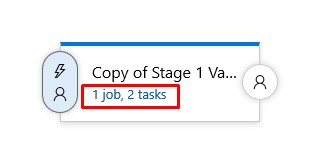
Our Build Pipeline now looks like this, but needs some configuration before it’s finished:
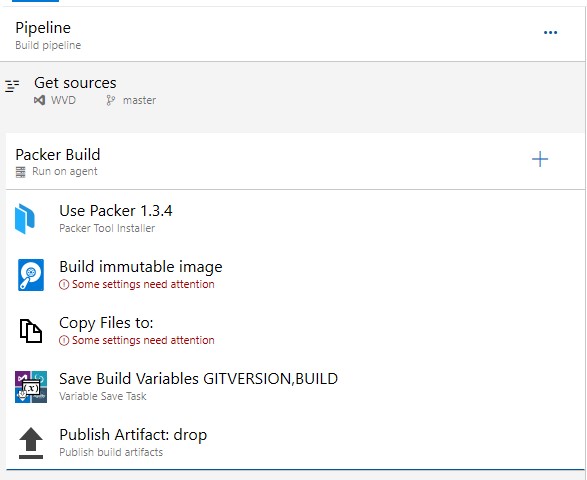
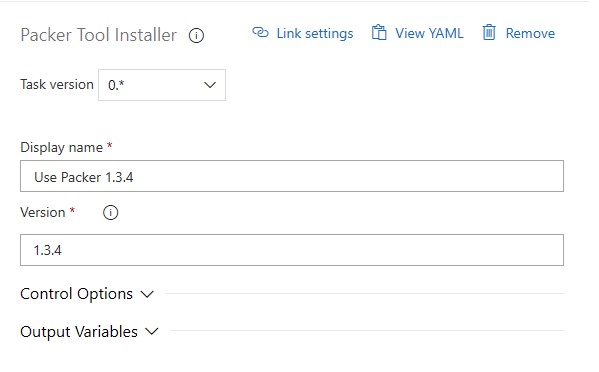
- Lets go through each task and perform the appropriate config. The Packer Tool Installer defaults will work for us:
- On the Build immutable image task:
- The Packer Template will be user provided
- The template location will be our packer-win10_1903.json that we put so much effort into generating earlier:
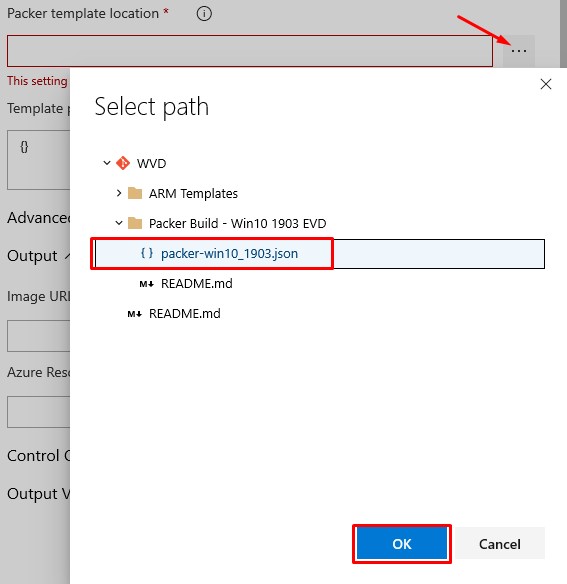
-
Template parameters: This is where our secure variables will go - the ones from the Azure Key Vault. You can add them using the GUI:
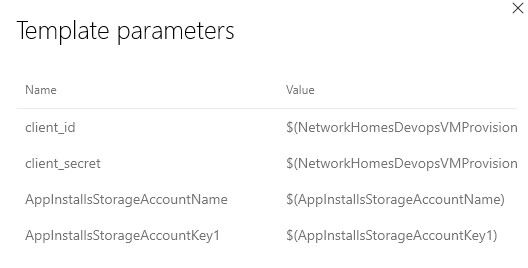
or paste in the below:
{"client_id":"$(DevopsVMProvisioningServicePrincipalAppID)","client_secret":"$(DevopsVMProvisioningServicePrincipalSecret)","AppInstallsStorageAccountName":"$(AppInstallsStorageAccountKey1)","AppInstallsStorageAccountKey1":"$(AppInstallsStorageAccountName)"} -
Output variables. Enter “BuildImage” into the “Image URL or Name” box:
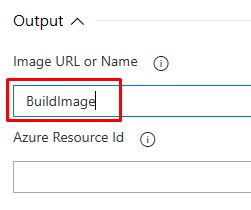 .
.This is reference to the exact image generated in this Build. This will be used by the Release to deploy the image in Azure to a WVD Host Pool.
-
The Copy files task essentially just copies static data - the WVD Arm Template which is in the Repo. Copying these files into the built-in location that Devops uses allows us to reference these “artifacts” during the Release Pipeline.
- Add
$(build.artifactstagingdirectory)to the Name -
Select the ARM Template folder:

-
Add
$(build.artifactstagingdirectory)to the Target folder
- Add
-
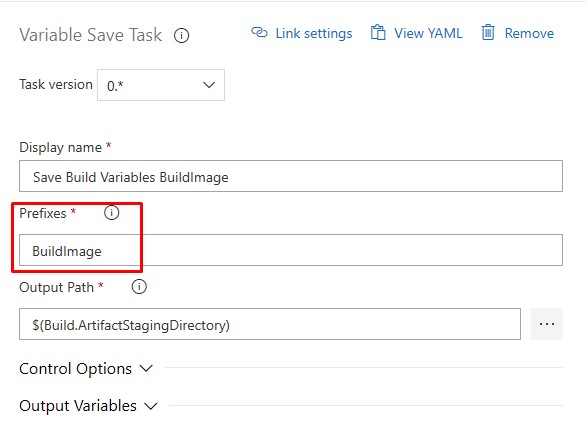
The Save Build Variables is a community tool which converts variables into artifacts. Variables are lost between Pipelines so we need a way to store the BuildImage name so that it can be referenced by the Release Pipeline.
-
Add BuildImage to the Prefixes box - it will automatically change the Task name
-
-
Publish Artifact: You don’t have to change anything, but “drop” isn’t helpful, so:
-
Now the Tasks are complete, lets add the Variables
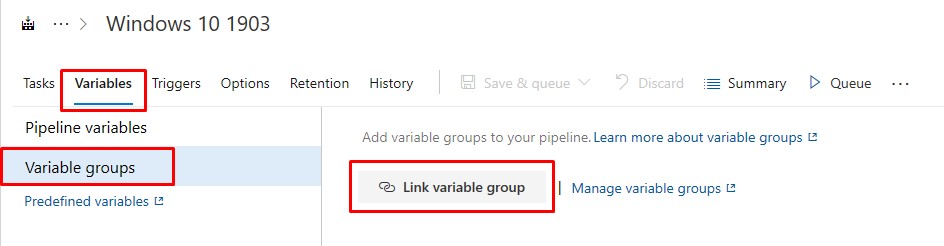
-
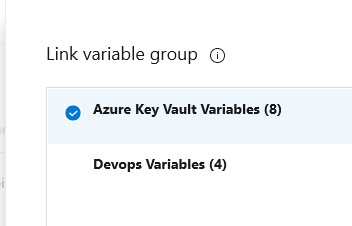
Link the Azure Key Vault Variables
-
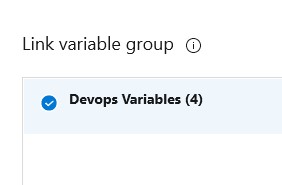
Link the Devops Variables
-
The Variables now looks like this:
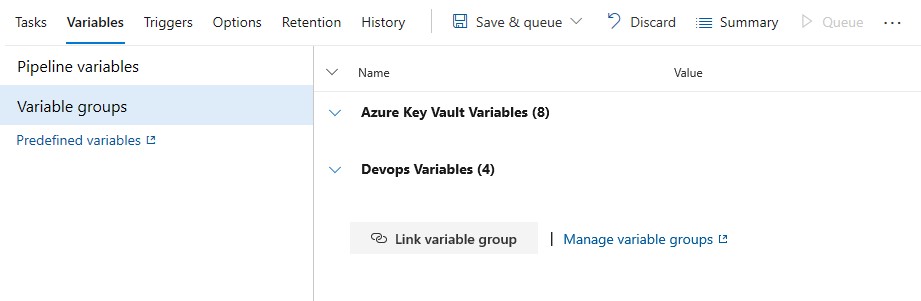
You can use those drop downs to view all the variables.
-
-
Options allow us to configure the job timeout to infinite:
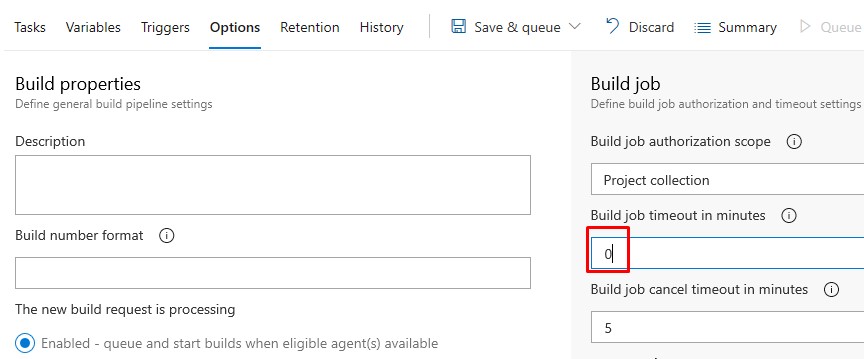 Note: 60mins is the max time on a private repo so 0 won’t make any different here, but it’s best to change it now in case you have switch Agent Pools or project visibility.
 - Once you have saved, the Queue option becomes available. Click on this to run the Build:
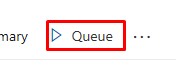
- The Hosted Agent will start and begin to process the tasks:
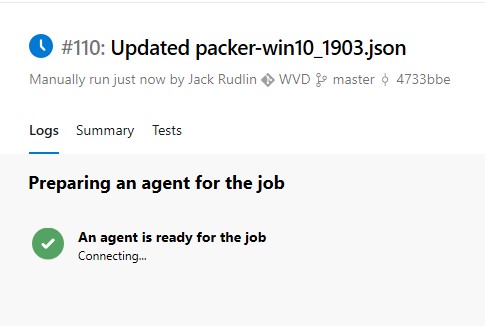
-
Whilst the build is in progress:
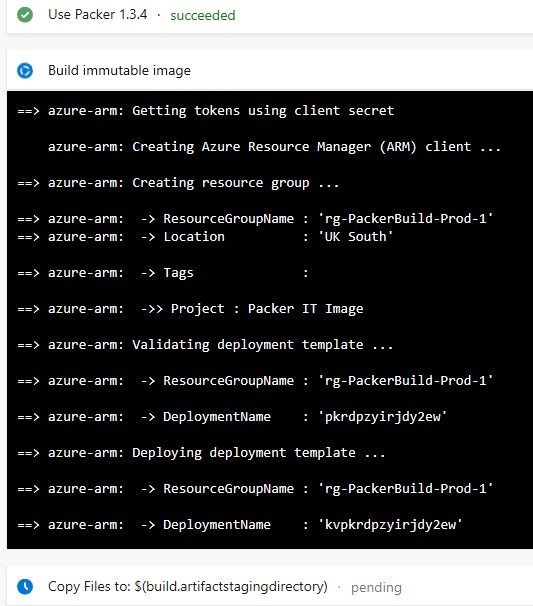
you should see the resources in the Azure portal:
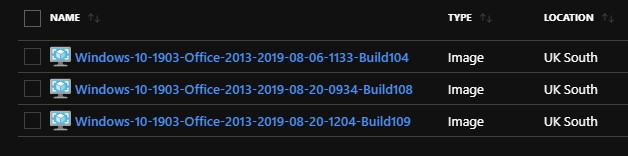
- Once the build is complete, a new image should exist in the
wvd_goldimage_rgResource Group: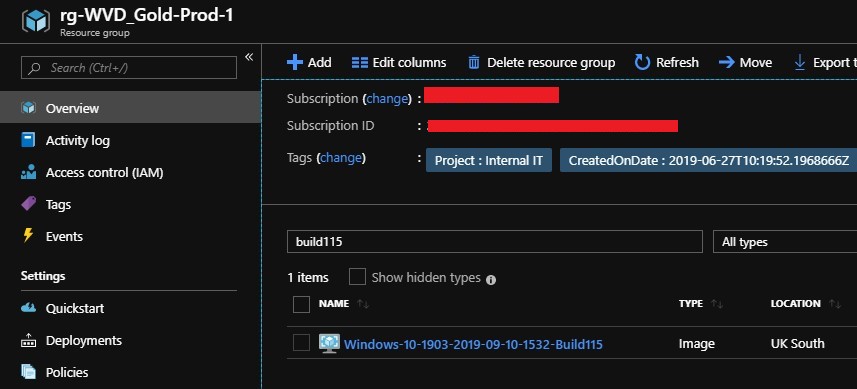 And you should get a confirmation email:
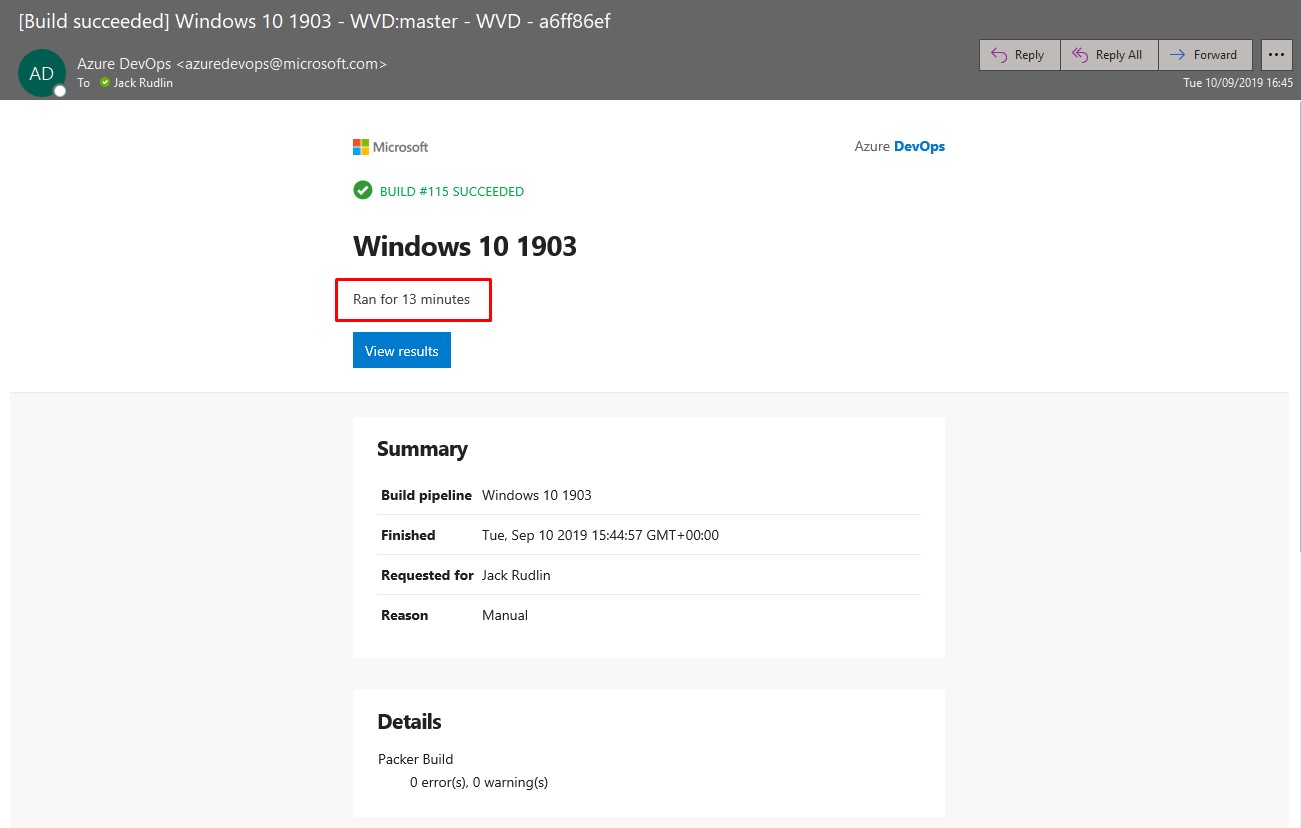
-
In Devops, go to Pipelines > Builds and click on the successful build. In the top right is the Artifacts drop down where Build Image is selectable:
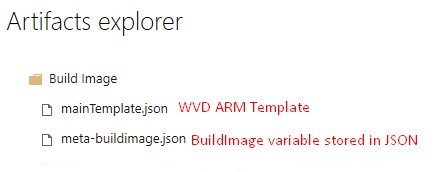
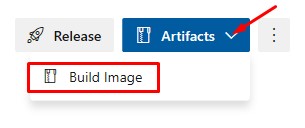 .
.You can expand the folder to see all the artifacts:
Release Pipeline
Now we have an Azure VM Managed Image and some Build Artifacts, we can put together the Release Pipeline.
The Release Pipeline will use the Azure VM Managed Image generated by Packer, to deploy a number of identical VMs into a Windows Virtual Desktop Host Pool using the WVD ARM Template (that’s already in our Repo).
Naturally, this assumes you have an existing WVD environment that can be tested with.
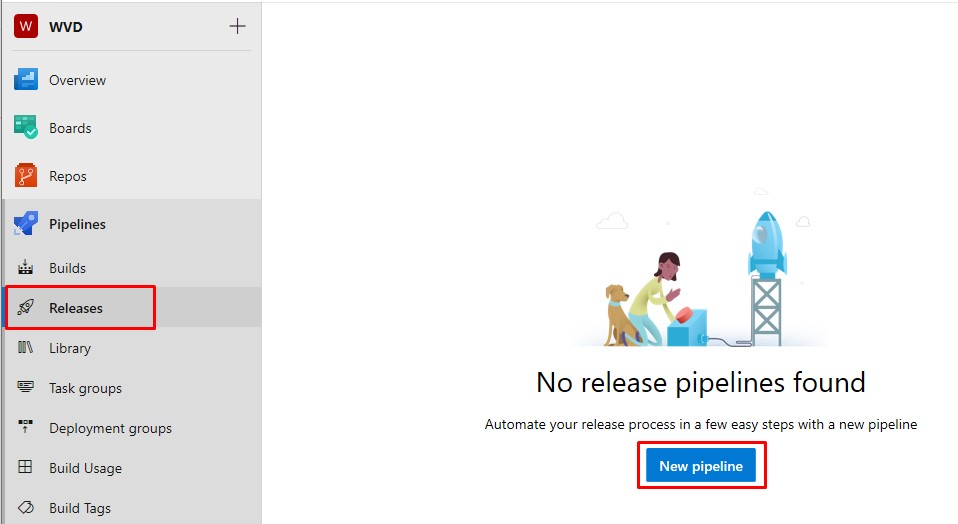
- Create a New Release Pipeline
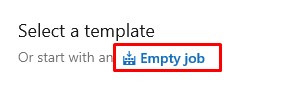
- Use an Empty Job
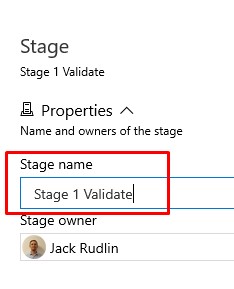
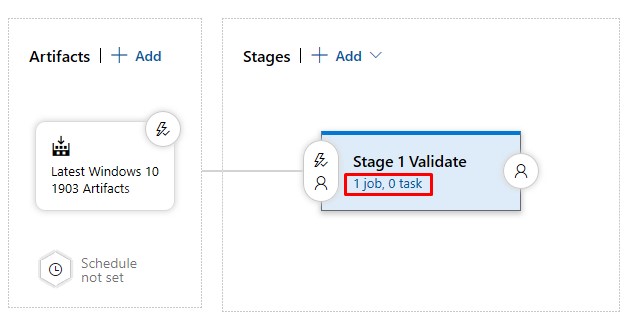
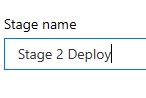
- Add the word “Validate” to the Stage name:
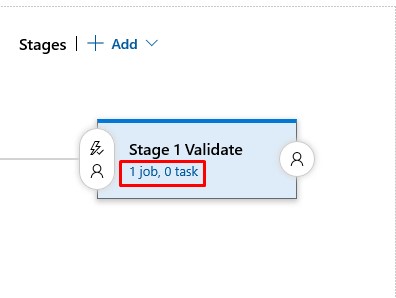
- Click on the Task
- Configure the Agent Specification (use the same as in the Build Pipeline)
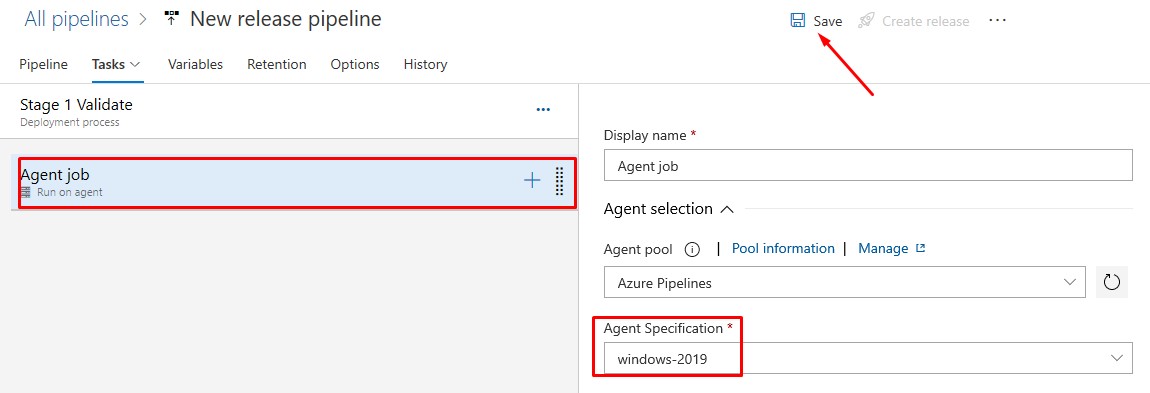
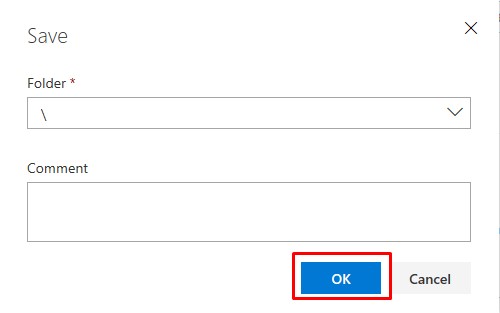
-
Save and use the default folder
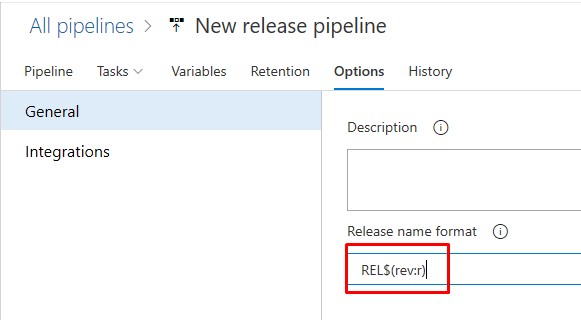
- Go to the Options tab abd change the Release name format to: REL$(rev:r) This forms part of the naming convention for the WVD VMs
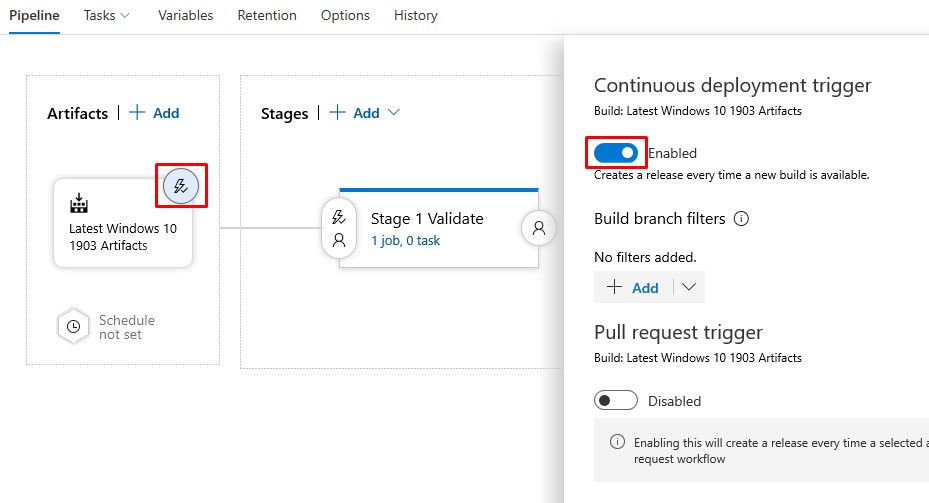
- Go to the Pipeline tab and Add an artifact:
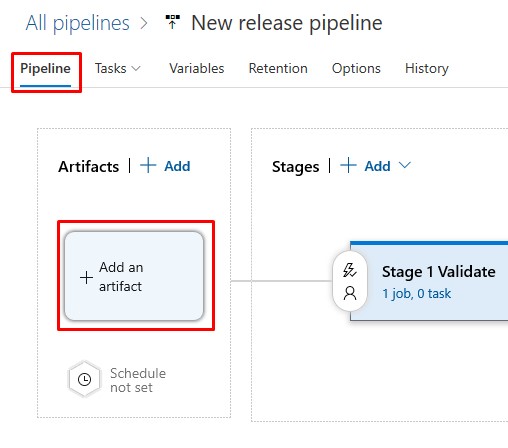
- Select the Windows 10 1903 Build Pipeline from the dropdown:

- Two additional options will appear. Choose the Latest version and then name your Source alias. Click Add

- Enable the Continuous deployment trigger so that each new Build that finishes succesfully will automatically run the Validate Task:
-
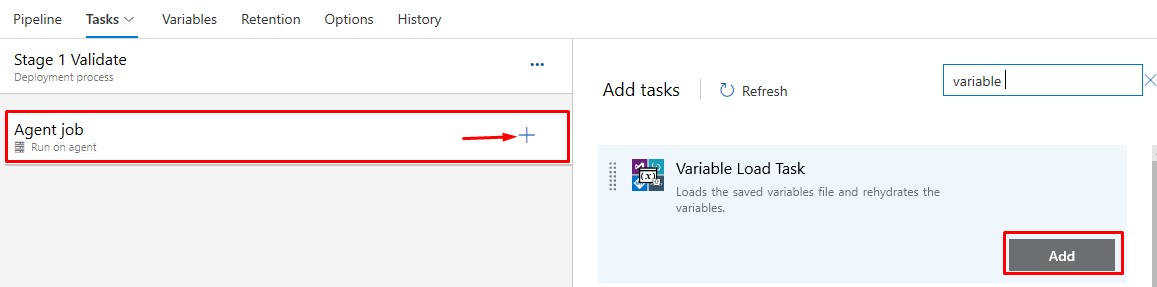
Edit the Validate task again
-
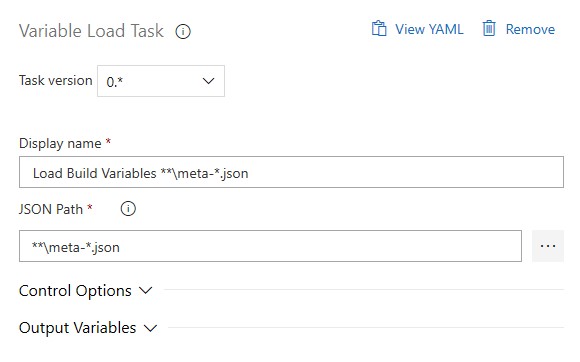
Add a Variable Load Task:
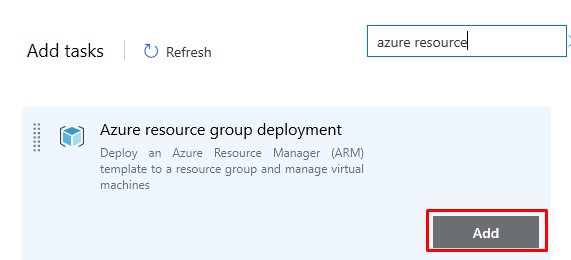
-
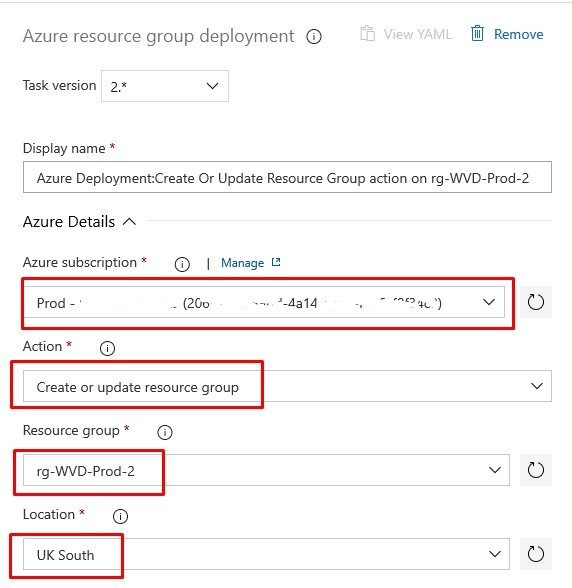
Add an Azure Resource Group Deployment Task:
- The Variable Load Task can be left as default. It will load the BuildImage variable using the json files generated in Build Pipeline
- In the Azure Resource Group Deployment Task:
- Using the four drop-downs, choose the Azure Subscription of where the WVD VMs will be deployed. The Action in this case as we’re deploying an ARM Template has to be Create or update resource group. The RG is where is the WVD VMs will end up. And finally the Location/region in Azure.
- Template location - Linked artifact
-
Template - reference the artifact: mainTemplate.json


- Template parameters - leave empty
-
Override template parameters:
-rdshCustomImageSourceName $(BuildImage)
-rdshCustomImageSourceResourceGroup $(wvd_goldimage_rg)
-rdshNamePrefix "VM-WVD-$(Release.ReleaseName)"
-rdshNumberOfInstances 4
-rdshVmSize "Standard_D8s_v3"
-rdshUseManagedDisks "true"
-rdshImageSource "CustomImage"
-domainToJoin "ad.domain.local"
-existingDomainUPN "$(DomainJoinAccountUPN)"
-existingDomainPassword "$(DomainJoinAccountPassword)"
-ouPath "OU=WVD,OU=Machines,DC=ad,DC=domain,DC=local"
-hostPoolName "HP-WVD-Prod-1"
-tenantAdminUpnOrApplicationId "$(WVDServicePrincipalAppID)"
-tenantAdminPassword "$(WVDServicePrincipalSecret)"
-existingVnetName "VNET-PROD-1"
-existingSubnetName "Subnet-VDI-Prod-1"
-location "uksouth"
-virtualNetworkResourcegroupName "rg-VNET-Prod-1"
-existingTenantName "WVD Tenant Name"
-aadTenantId "$(az_tenant_id)"
-isServicePrincipal "true"
So all the values above starting with a
$should come from your variable groups. Everything you should customise for your environment.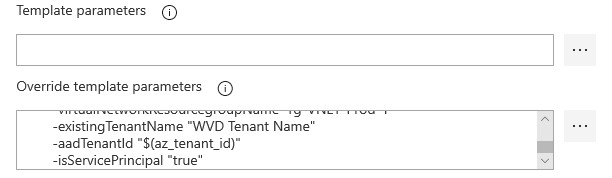
-
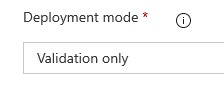
Deployment Mode in this Task should be Validation only. This will check we have specified all of the correct parameters against our ARM Template.
- The rest of the options remain as default. Don’t forget to Save at the top
- Using the four drop-downs, choose the Azure Subscription of where the WVD VMs will be deployed. The Action in this case as we’re deploying an ARM Template has to be Create or update resource group. The RG is where is the WVD VMs will end up. And finally the Location/region in Azure.
-
Back on the Pipelines tab you should see something like this:
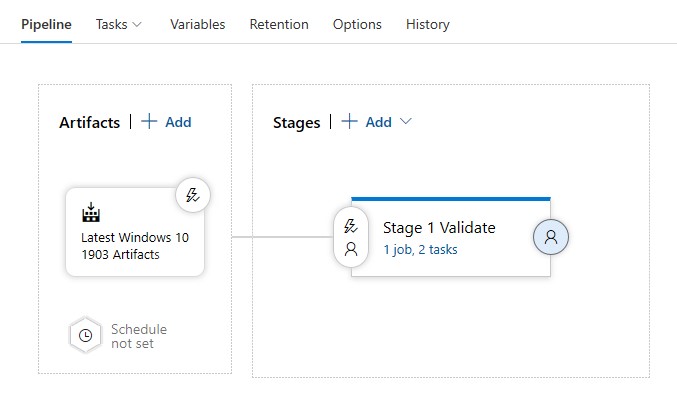
-
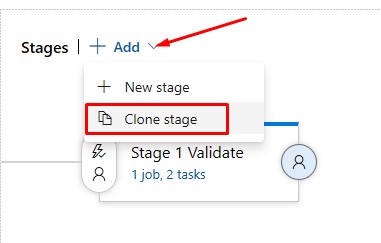
Now so far we are only validating the template, now we need a new task that actually creates a Resource Group deployment for the WVD VMs. Clone the existing Task:
-
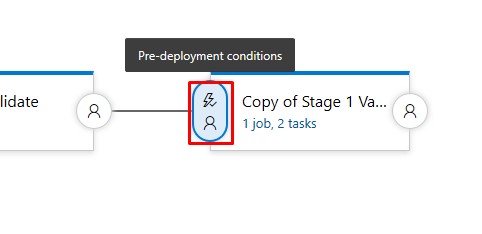
Now the choice is yours. As it is, after the Validation task completes successfully, providing we make some changes the steps within the task, it will automatically create a Resource Group deployment. I’m going to change the deployment Task so that it doesn’t automatically run - as I like to plan for UAT, I want to run the deployment task manually.
-
Click on the Pre-deployment conditions:
-
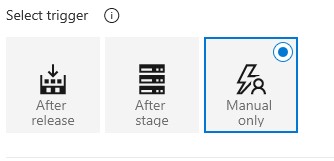
Choose Manual only:
-
Edit the new Task:
-
Change the Stage name:
-
Click the Azure Resource Group Deployment step and change the Deployment mode to Incremental:

-
Save
-
Back on the Pipelines tab, it should look like this:
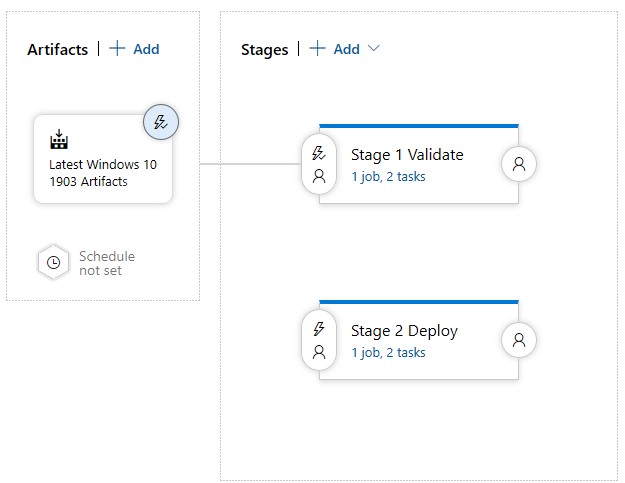
-
-
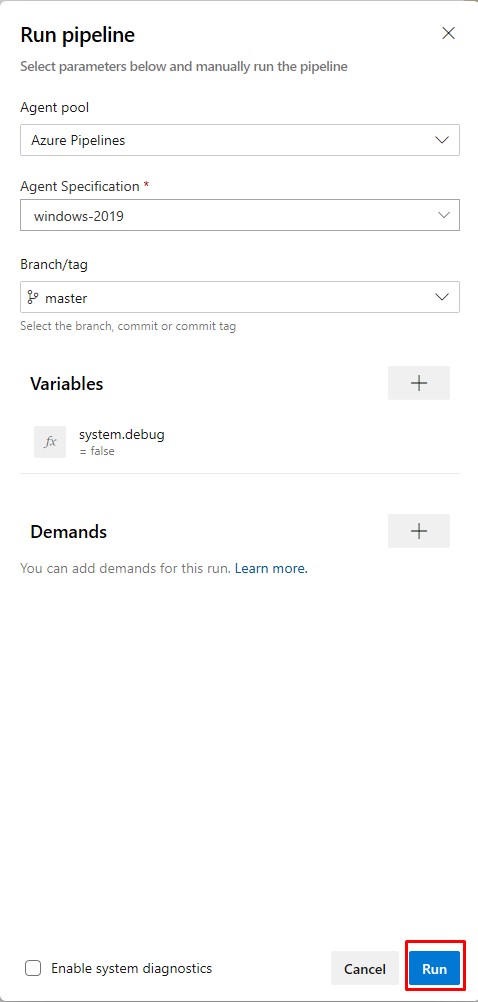
This time round, we’ll kick off a manual release, as the Build has already completed, but from herein after, a Release will be automatically generated after each successful Build - and the Validation stage will run.
-
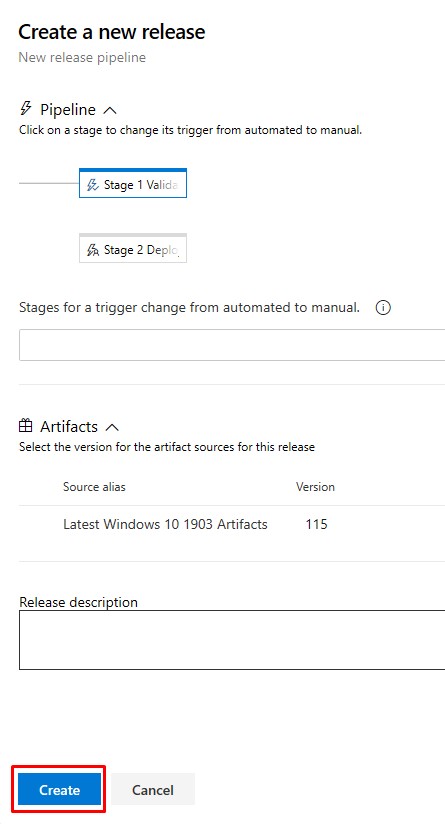
Click on Create release:

-
Leave the dedaults and hit Create. Only the Validation stage will run.
-
Check the status of the *Release:
-
The Validation stage has succeeded:
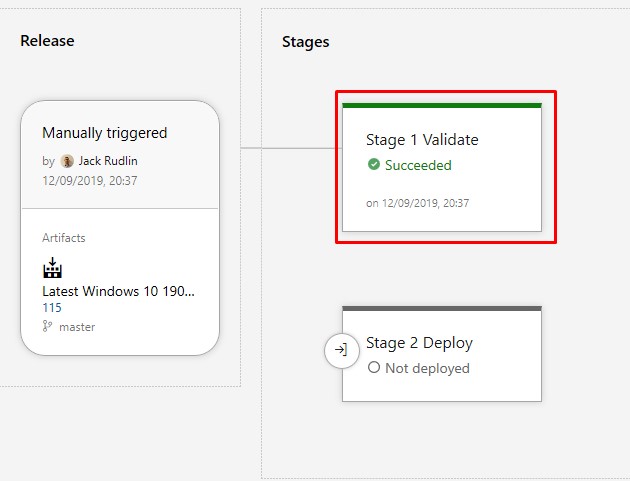
-
-
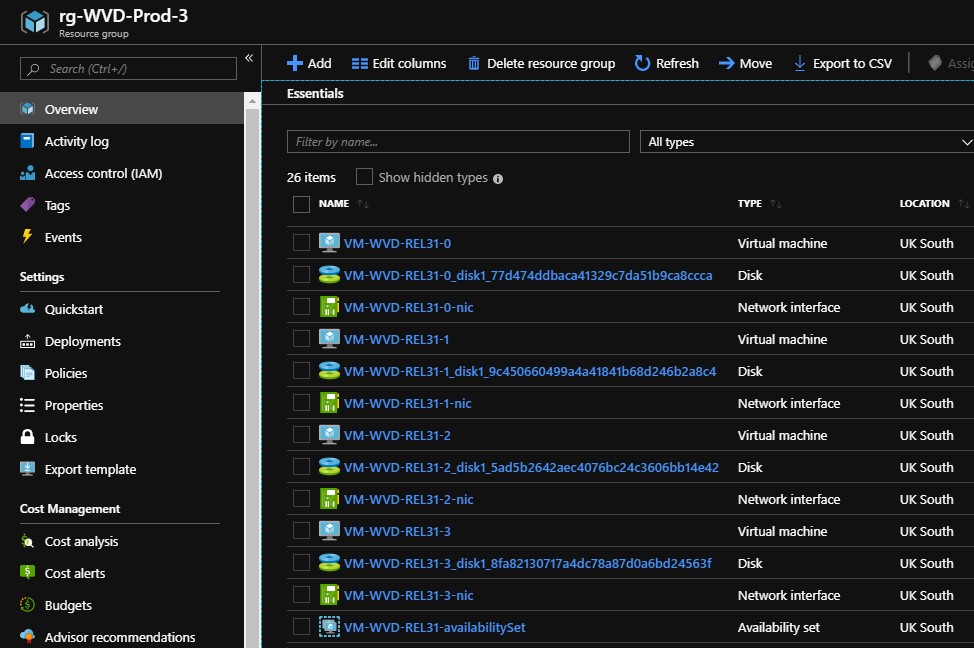
Now now that the ARM template has succeeded in validation, we can manually run the Deploy stage which will actually initate the Resource Group deployment. x number of Win10 Azure VMs will be created and added to your desired WVD Host Pool:

-
Resources deployed in Azure:
-
VMs available in the WVD Host Pool:

-
Final Word
I very much doubt you made it this far - to be honest, I struggled myself. But if you did, I think you’ll see that you can now quickly edit the Packer template, run a Build, and then Deploy a Release, all within the space of an hour.
This brings a lot of moving parts together into one slick solution, with great logging and the option of a fully enabled CI/CD Pipeline.