Updated:2022/02/17 [Now supports Trusted Launch VMs and Disks using the -SecurityType "TrustedLaunch" parameter.]
Using PowerShell (and the Azure Portal) to reduce/shrink the OS Managed Disk size for a Windows VM in Azure.
Overview
At present it is not supported to reduce/shrink the OS disk (managed or unmanaged) size of an Azure VM from the Azure Portal (say from 128Gb to 32Gb for example), using PowerShell or any other tools. A Microsoft blog post covers this statement and also an alternative approach to this post.
This is an adapted version of my original post Shrink Azure VM OS disk size (reduce)
Scenario
For cost saving (and performance) reasons you may want to reduce the size of the OS Disk (or data disks for that fact) that are already assigned to a running VM - if there is sufficient space within the volume to first shrink the volume within the OS.
Many on-prem VMs are built from a VMWare template, often with an oversized OS drive to cater for growth which never materialises. If you find there is plenty of free space to go down to a 64GB or even a 32GB OS Disk, then check out these steps.
Alternative Approach
The technique used to the reduce the disk in this post is identical to that of the Microsoft post mentioned above, except that here we use only PowerShell without relying on an opensource tool.
Another difference in my method is that it is dynamic - in that it reads the footer from a new disk created in Azure, ensuring the correct value is always written and up to date.
Finally, I am using the swap disk method rather than creating a new VM from the new Managed Disk
Shrink Disk
Pre-Reqs
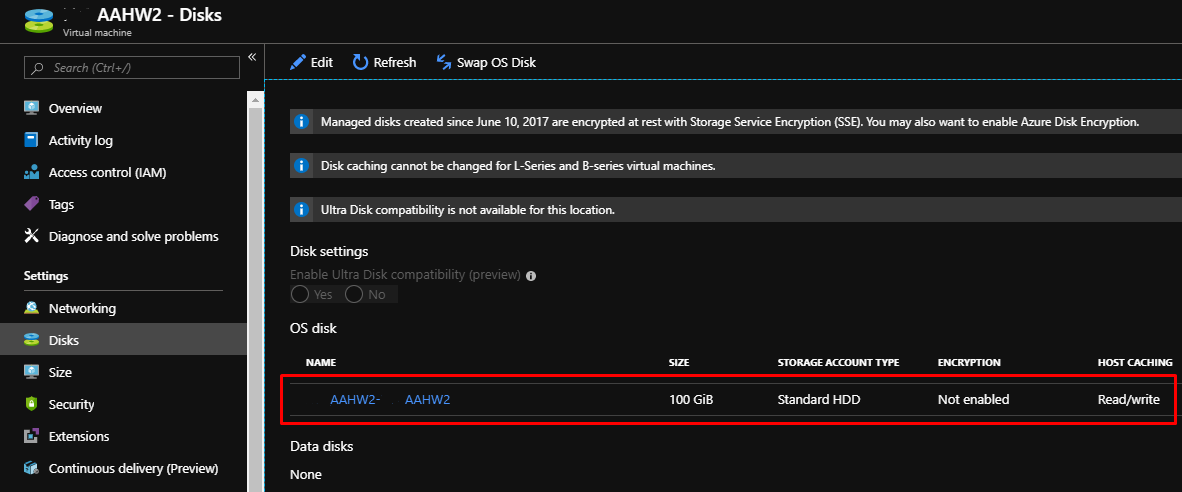
In this example, the Azure VM AAHW2 (yeah I know you can see I’ve done a bad job of masking the first few chars of the original name) has a managed OS disk size of 100Gb running the Standard HDD storage type. As the disk is Managed, we will be charged for a 128GB disk:
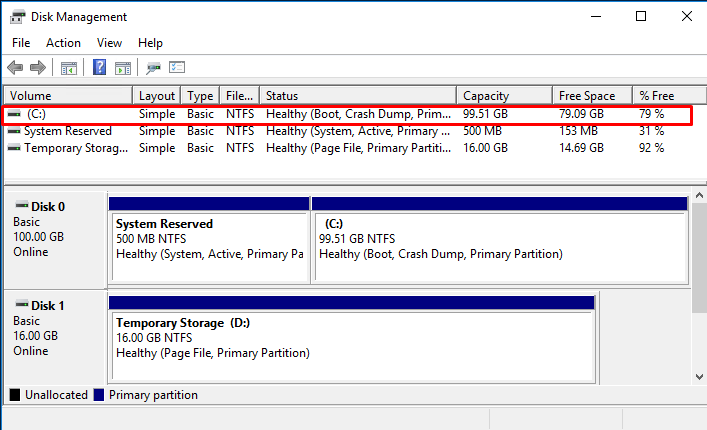
We can see that there is sufficient space on the C drive to reduce the Azure Managed disk size to 32Gb:
Shrink the OS Partition
- Open PowerShell as Administrator
-
Run:
Get-Partition -DiskNumber 0where0is the Disk number of the OS Disk: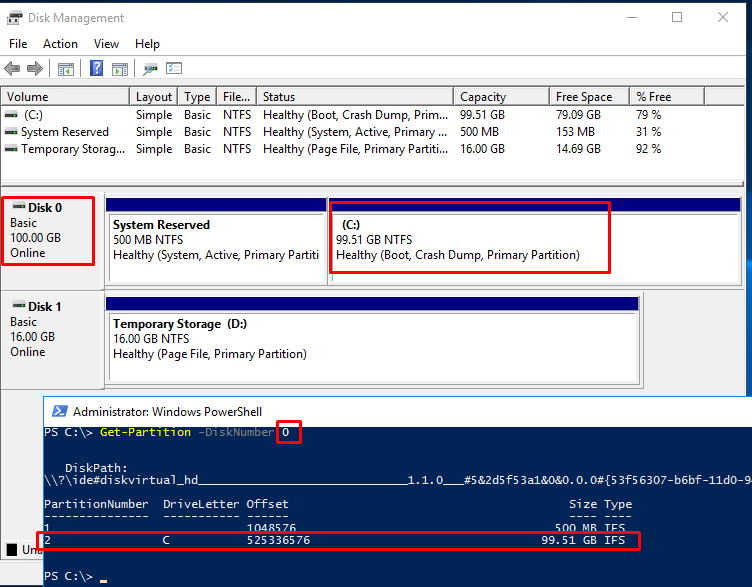
-
We now have the PartitionNumber which is “2” – this is the OS Disk “C”
-
Work out what the new OS Volume size will be + the existing System Reserved partition.
So if we set the OS partition to 31GB and add 500MB for the System Reserved partition we get 31.5Gb in total for Disk0. This is within the 32Gb Azure Disk size so will work in this scenario.
-
In PowerShell run:
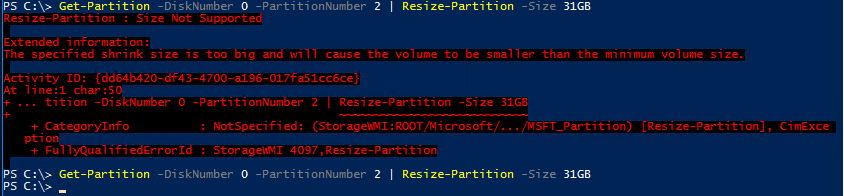
Get-Partition -DiskNumber 0 -PartitionNumber 2 | Resize-Partition -Size 31GBHere we have specified the PartitionNumber retrieved above and the new OS Disk partition Size that we want (based on the Azure disk size of 32Gb) -
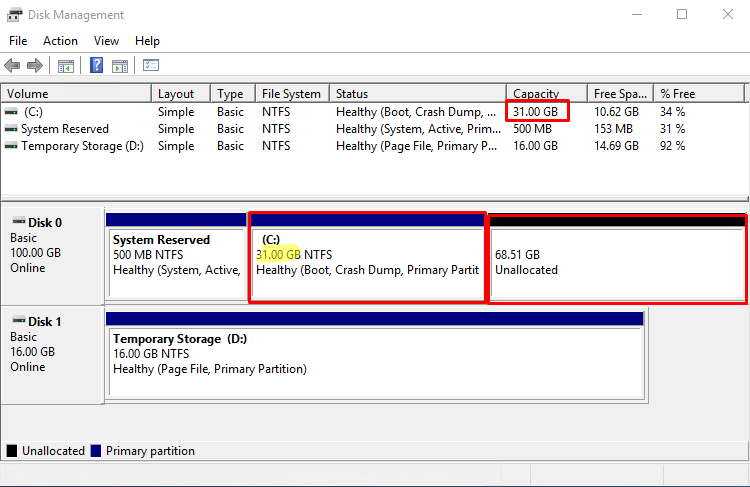
You should end up with the below disk configuration:
- If you get the below error
The specified shrink size is too big and will cause the volume to be smaller than the minimum volume size
just run the PowerShell cmd a few more times until it succeeds:
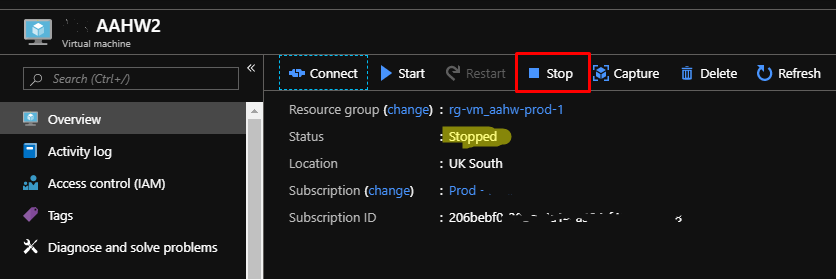
- Shutdown the VM from within the OS
-
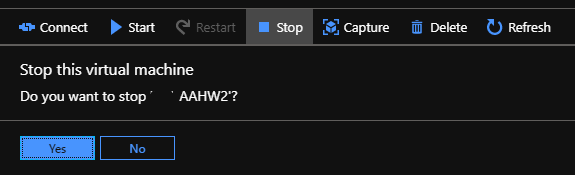
Deallocate the VM from the Azure portal:
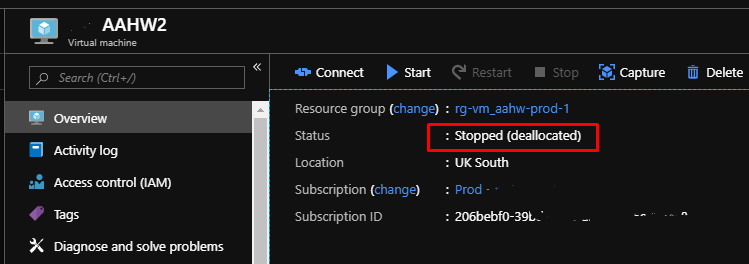
- Wait until the VM becomes Stopped (deallocated):
Resize the Azure VM OS Managed Disk
-
Open PowerShell as Administrator and install the Az module:
Install-Module Az -
Take a copy of the Shrink-AzDisk.ps1 script.
-
Go to the Disks blade on the VM and click on the OS Disk:
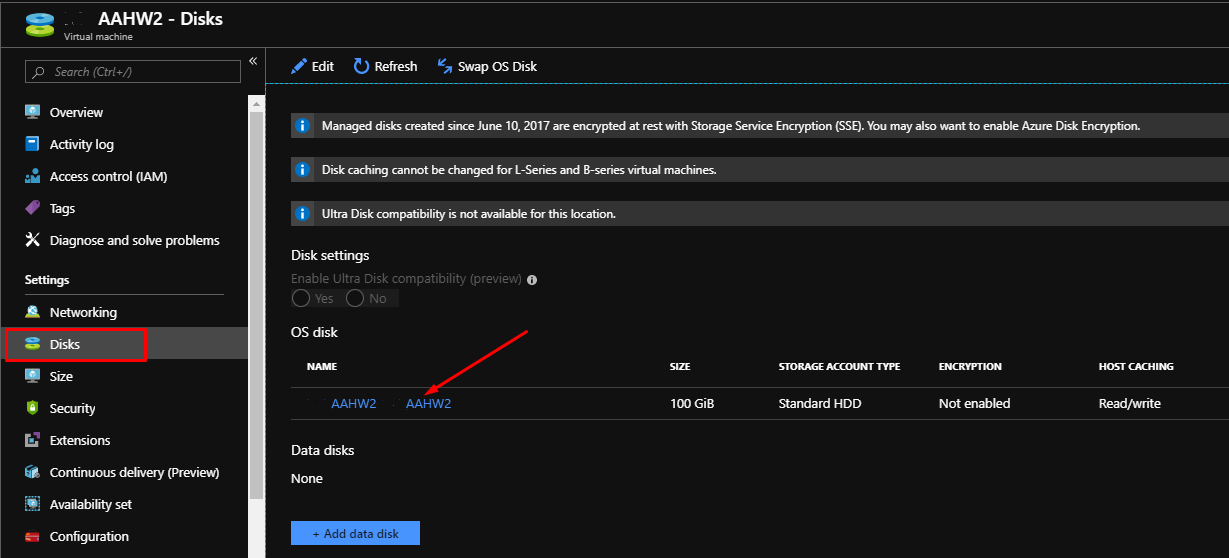
-
Go the Properties blade of the disk and copy the Resource ID:

- Paste the Resource ID into the
$DiskIDvariable in the script:# Variables $DiskID = "/subscriptions/203bdbf0-66pp-1111-aaaa-j822ce7a34j4/resourcegroups/rg-server1-prod-1/providers/Microsoft.Compute/disks/Server1-Server1" - Change the
$VMNamevariable to the VM name as it appears in Azure:$VMName = "AAHW2" - Change the disk size if 32Gb is too small, you can go to the next size up which is 64Gb – bear in mind that the above steps would need to take 64Gb into account though (so shrinking the OS disk for example)
$DiskSizeGB = 32 - Add the name of the Azure subscription. It can be retrieved by running the
Get-AzSubscriptioncmdlet$AzSubscription = "Prod" - The variables section at the top of the script should look something like this now:
# Variables $DiskID = "/subscriptions/203bdbf0-66pp-1111-aaaa-j822ce7a34j4/resourcegroups/rg-server1-prod-1/providers/Microsoft.Compute/disks/Server1-Server1" $VMName = "AAHW2" $DiskSizeGB = 32 $AzSubscription = "Prod" - Save your updated PowerShell script.
The Script
- You will need at least VM Contributor and Storage Account Contributor rights in Azure to run this script.
- You will also need access to create Managed Disks. You can use
Microsoft.Compute/disks/*to create a custom Azure Role if you like. - The Script will:
- Create a temporary Storage Acccount
- Create a new temp disk in the new Storage Account to read the footer from
- Copy the Managed OS Disk into the temp Storage Account
- Change the footer (size) so the OS disk shrinks
- Convert the disk back to a Managed Disk
- Swap the VM’s current OS disk with the new smaller OS Disk
- Tidy/Delete the temp storage account and the old managed disk
-
Now you can either run small chunks (recommended) by copy-pasting code from your script windows into your PowerShell, or you can run the script. It will prompt you to login with your Azure admin credentials.
Note: I haven’t built any error handling or checking into this script, hence the above suggestion.
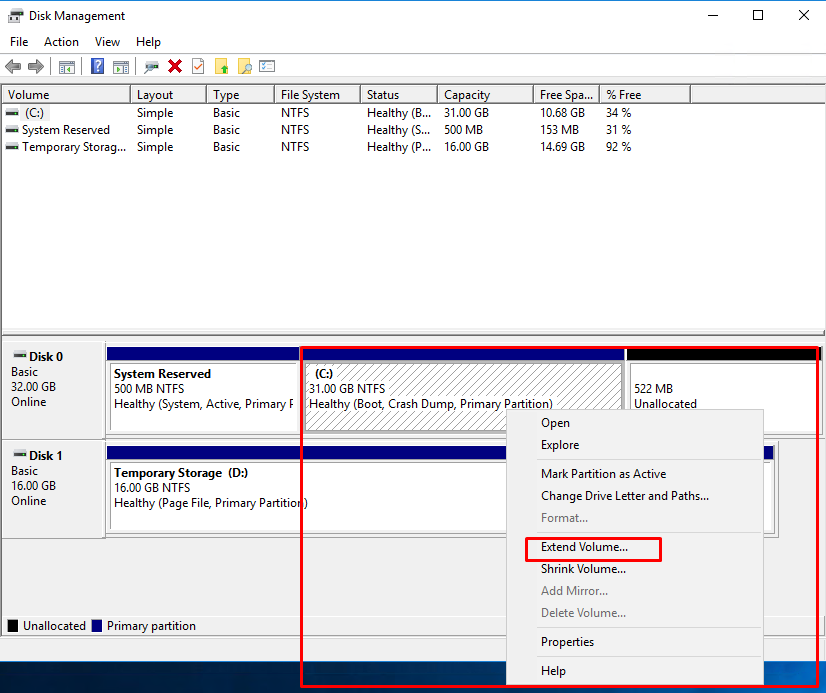
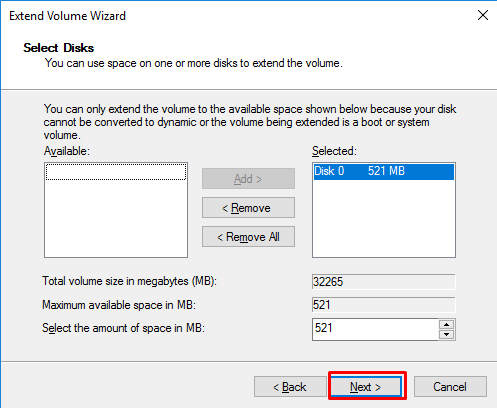
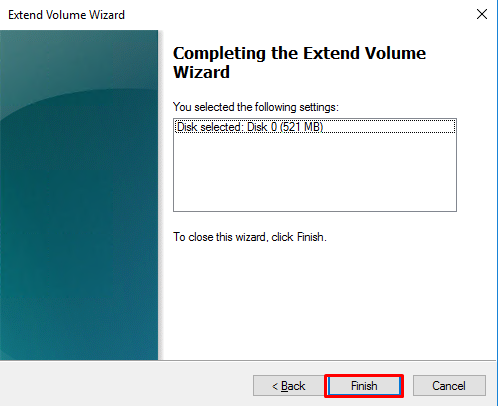
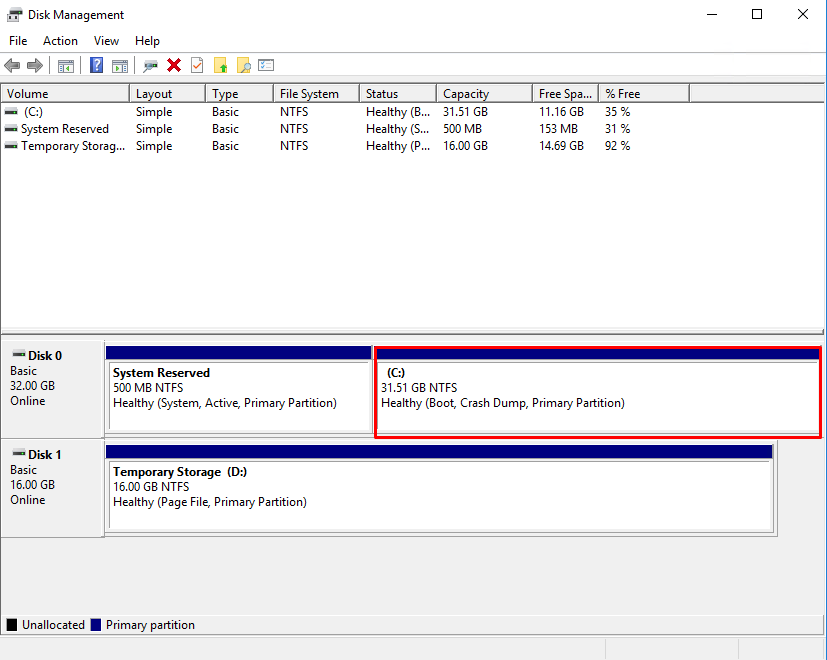
Extend the OS Partition
- Now the Azure VM is back up and running with the new smaller OS Disk, you can go ahead and extend the OS volume to use all the remaining free space: